
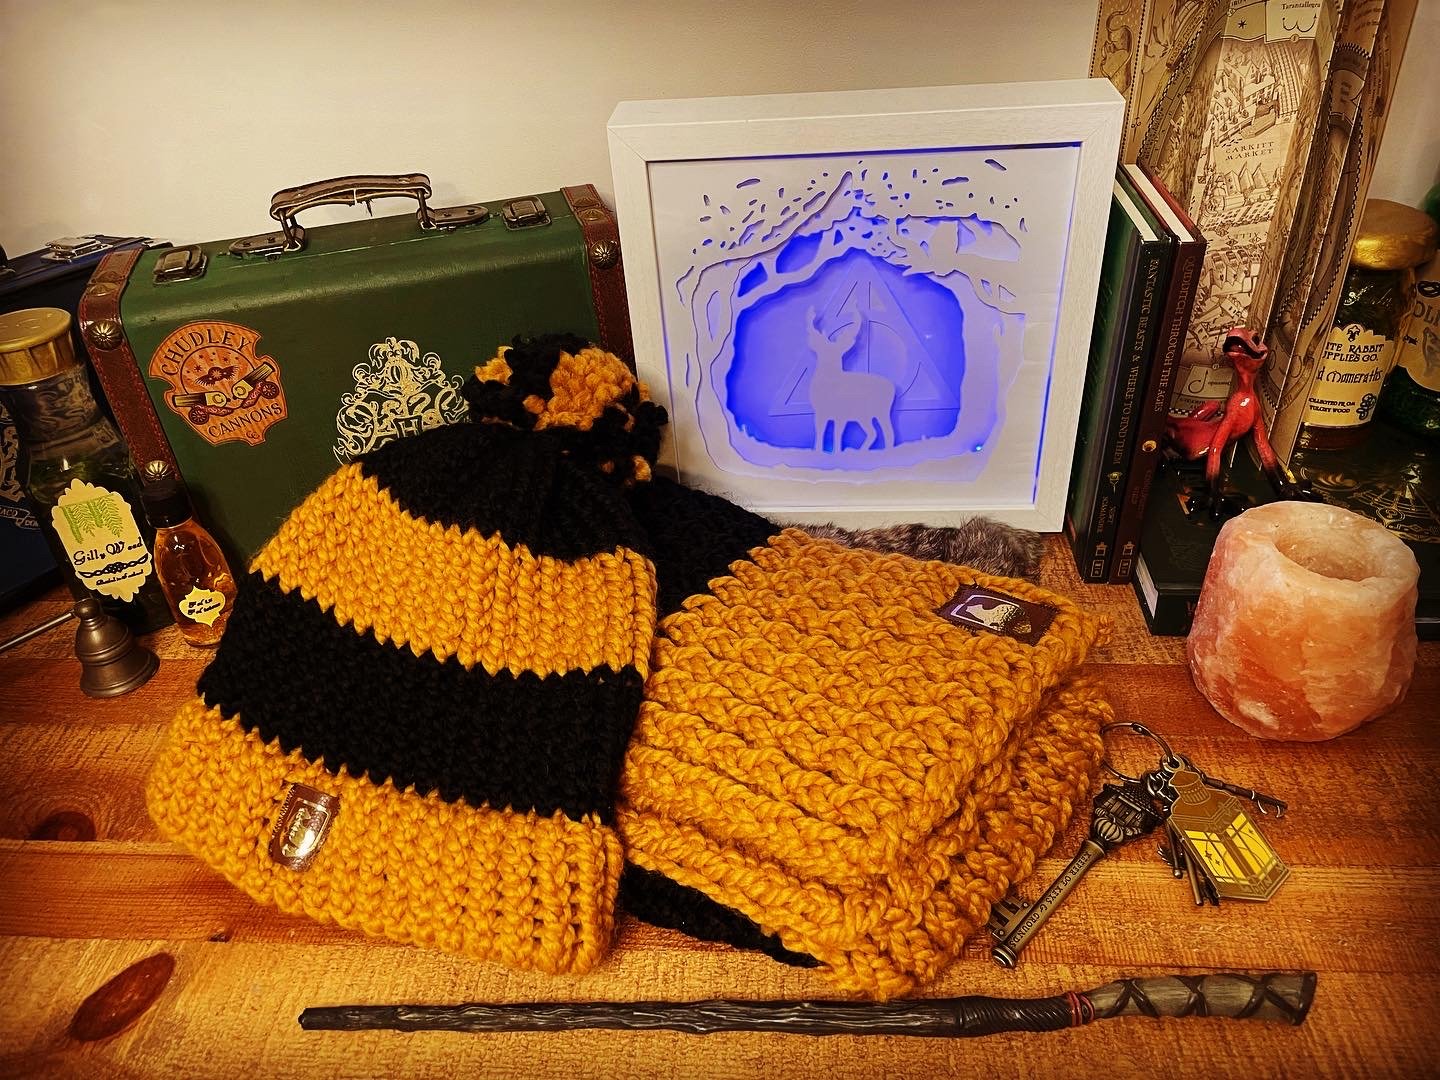
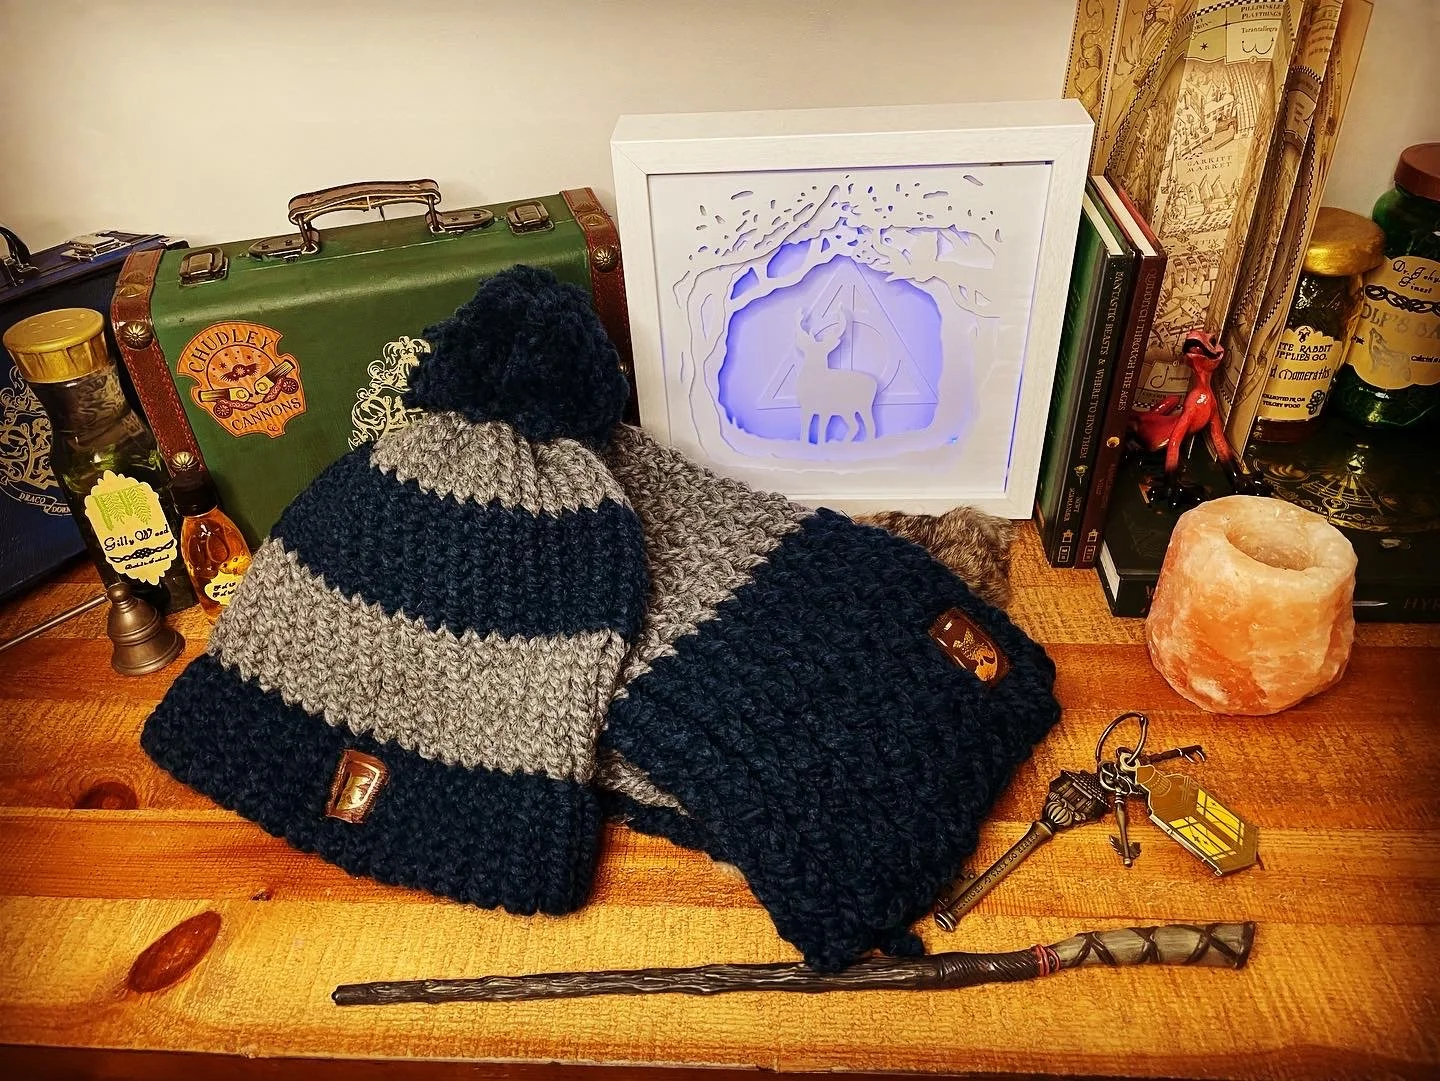
Harry Potter Holiday Scarf
Looking to make a beautiful gift for the Harry Potter fan in your life?
These holiday scarves are a luxurious gift for any recipient or maybe even a cozy gift for yourself.


*Slytherin not pictured. They were made for a toddler and much smaller than the others.
Happy Christmas, Harry
If you have been following me for a while, then you know how I first got into loom knitting. If not you can read the post here (and see how to make an infinity scarf) or I can give you the short version.
Short version: I stole my daughter’s gift and became a loom knitting machine!
After mastering the loom (and infinity scarf), I wanted to try and make a Harry Potter-themed house scarf.
It couldn’t be that hard, right?!
It wasn’t! I channeled my inner Molly Weasley and made a hat and scarf set for the whole family.
My daughter is enjoying the series more lately and I wanted to make her some special items. And if I make them for her, my son will inevitably want them too!
After I finished them, they looked so amazing I had to share them with you!
I will share the images I used for the crests with you in the tutorial.
Let’s begin…
***If you read my loom knitting tutorial, you can skip the next part!
What is loom knitting?
Loom knitting is a form of knitting where you use a tool to create a knitted garment or blanket. The tool contains a prearranged set of pegs for you to weave yarn in. Each peg counts as a single knit.
Looms come in a variety of shapes and sizes; each one has its own purpose. The most common shapes for loom knitting are:
Circular, Rectangular, Long and Narrow, X-shaped, Oval, and S-shaped.
Each shape offers different benefits for completing certain projects. Additionally, the number of pegs and their spacing determines the size of the project and the weight you should use. For this project, I used a rectangular loom that contained 24 pegs.
I promise you, it is not that complicated! (Although it can be if you would like to dive into learning about different techniques)! If you would like to read more about loom knitting, check out this blog here.
But let’s get started on how I set up my projects!
This post contains affiliate links. Read my full disclosure for more info.
List of Supplies:
Makes: 1 scarf ***Some yarns provide more yardage in their skeins (rolls) so you may be able to get two scarves out of a single skein.
Estimated Time: between 1 - 2 1/2 hours depending on how fast you weave.
Sewing skills needed/used: Needlework at the end to secure the two ends of the scarf together, basic knots
Skill Level: Beginner
You can choose whichever kit, project, or instructions you would like. Here are some others that would make good starting kits:
Loom Kit for adults (multiple projects)
Loom Kit for kids (hat with pom-poms)
Loom Kit for kids/teens (beanie bun and fingerless gloves)
Just remember you need:
A loom
Yarn (your choice)
Gryffindor - 1 skein Lion Brand Wool Ease, color Cranberry, and 1 skein Big Twist Natural Blend, color mustard
Hufflepuff- 1 skein Big Twist Natural Blend, color mustard, and 1 skein Lion Brand Wool Ease, color black
Ravenclaw- 1 skein Big Twist Natural Blend, color medium grey, and 1 skein Big Twist Natural Blend, color navy
Slytherin- 1 skein Lion Brand Wool Ease, color black, and KC Premium yarn, color evergreen
Optional: Gold Vinyl
Optional: Vinyl Cutting Machine
Optional: Leather Sheet
How to make a Harry Potter-inspired scarf

Step 1:
Gather your supplies.
I also recommend a good movie, podcast, audiobook, or another form of entertainment.
Familiarize yourself with the loom. Hold it in your hands, and find a comfortable way to grip it.
I also like to designate a top and bottom so I don’t end up rotating it throughout the project.

Step 2:
Anchor the project, leaving several inches of yarn as a tail (you will sew this in at the end).
The instructions for my kit called for a slip knot, however, I just tied a simple knot to the anchor peg.
*Some looms do not have an anchor peg and that is okay.

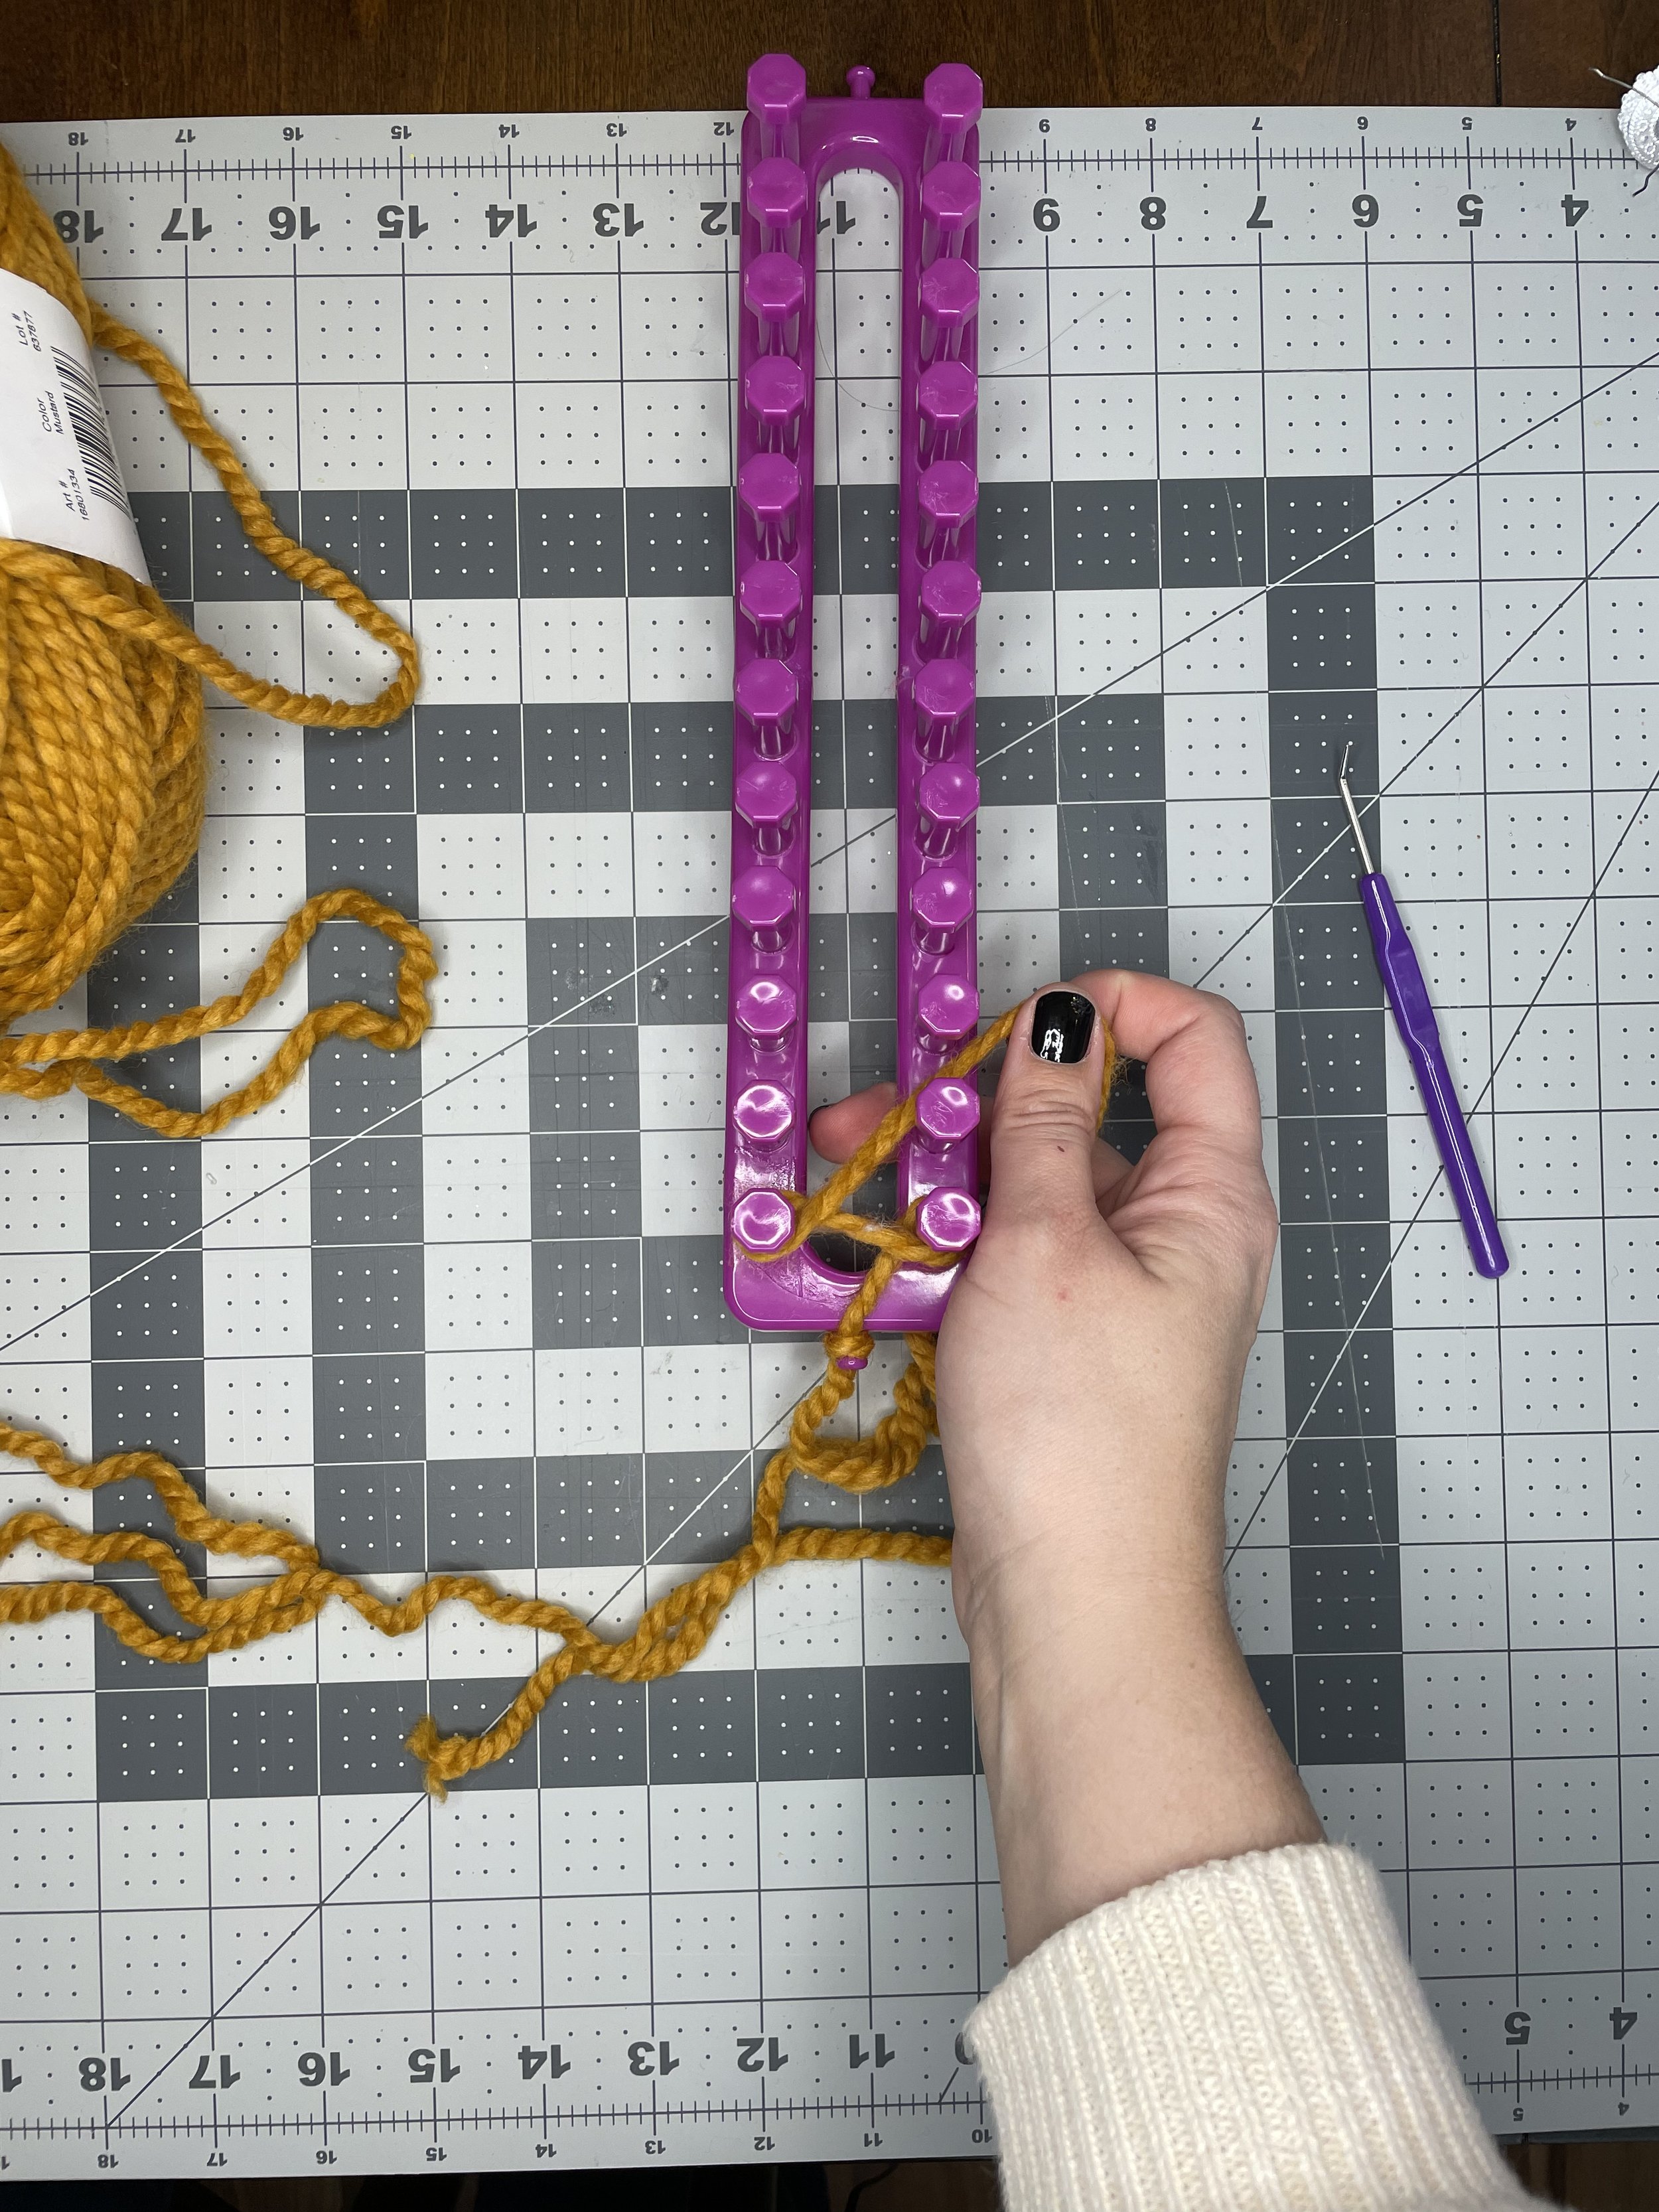
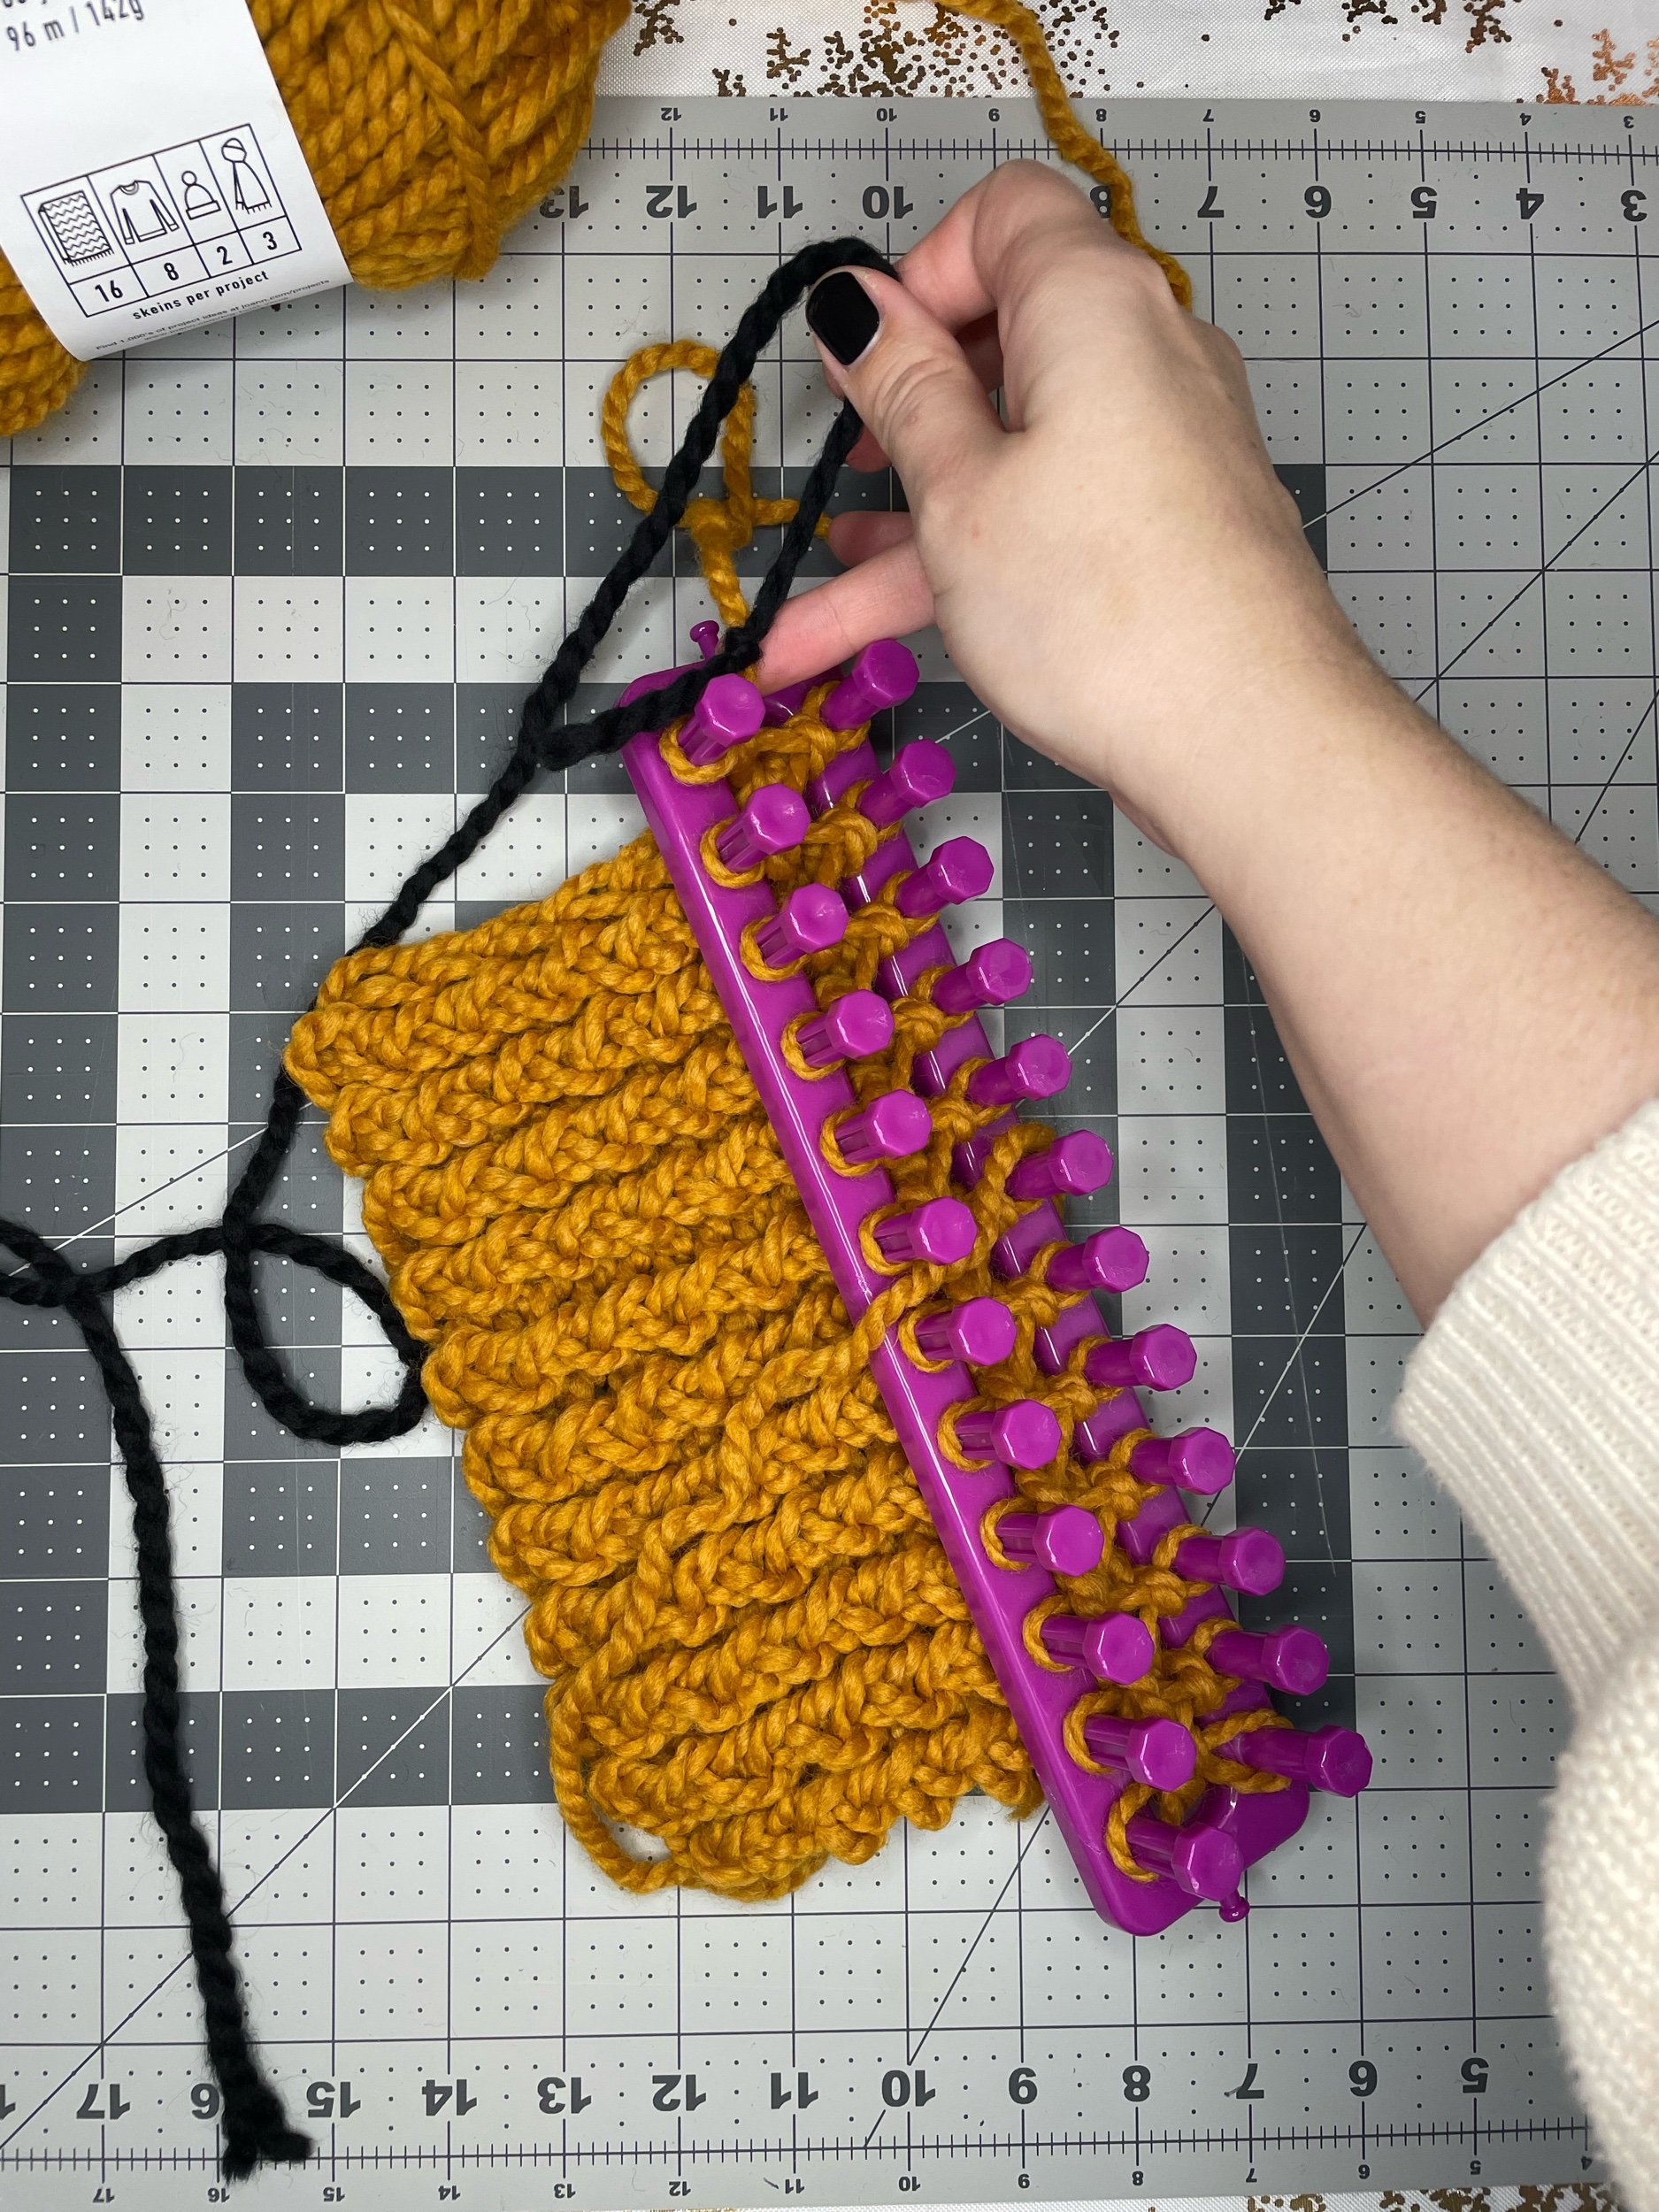
Step 3:
Wrap the first peg.
I like to look at the loom as a ladder. So I am going to start climbing with my yarn.
I take my anchored yarn and wrap it around the TOP of the first peg. This means that I will wrap all the pegs on this side of the loom in a clockwise motion.
*You can number your pegs to make it easier for you if you would like. Evens on one side and odds on the other. In my case, my odds would be on the right and evens on the left.

Step 4:
Wrap the second peg.
After I wrapped my yarn around the first peg, I wrapped it around the second peg's TOP. This means I will wrap the pegs on this side of the loom in a counterclockwise motion.
If you keep your loom vertical, then just remember that the yarn needs to wrap around the TOP of each peg on your way UP.
Step 5:
Wrap the third peg.
I took my yarn and wrapped it around the TOP of the third peg in a clockwise motion.

Step 6:
Wrap the fourth peg.
I took my yarn and wrapped it around the TOP of the fourth peg in a counterclockwise motion.

Step 7:
Weave the yarn through the remainder of the loom.
You will end on the opposite side of the loom (peg 24). So if you started on the right peg you will end on a left peg and vice versa.

Step 8:
Push the yarn down.
If you look at the loom, you will see that your current weave is at the top of each peg.
I took my finger and pushed this down so that the loops are at the bottom of their pegs.
(See below for more images)


Step 9:
Wrap the 23rd peg.
This is where the process becomes slightly confusing but bear with me.
Remember how I said I like to look at the loom like a ladder? Well, we are going to work our way DOWN.
This means everything will be in reverse.
I took my yarn and wrapped it around the BOTTOM of the 23rd peg in a counterclockwise motion.

Step 10:
Wrap the 22nd peg.
I took my yarn and worked my way down, making sure that my yarn wrapped around the BOTTOM of the 22nd peg in a clockwise motion.

Step 11:
Wrap the 21st peg.
I took my yarn and wrapped it around the BOTTOM of the 21st peg in a counterclockwise motion.

Step 12:
Weave the rest of the loom.
You will end on the opposite side again (peg 1).
You will now have two loops on your loom: the ones we pushed down and the ones we just created.
*You will not have two loops on peg 24.


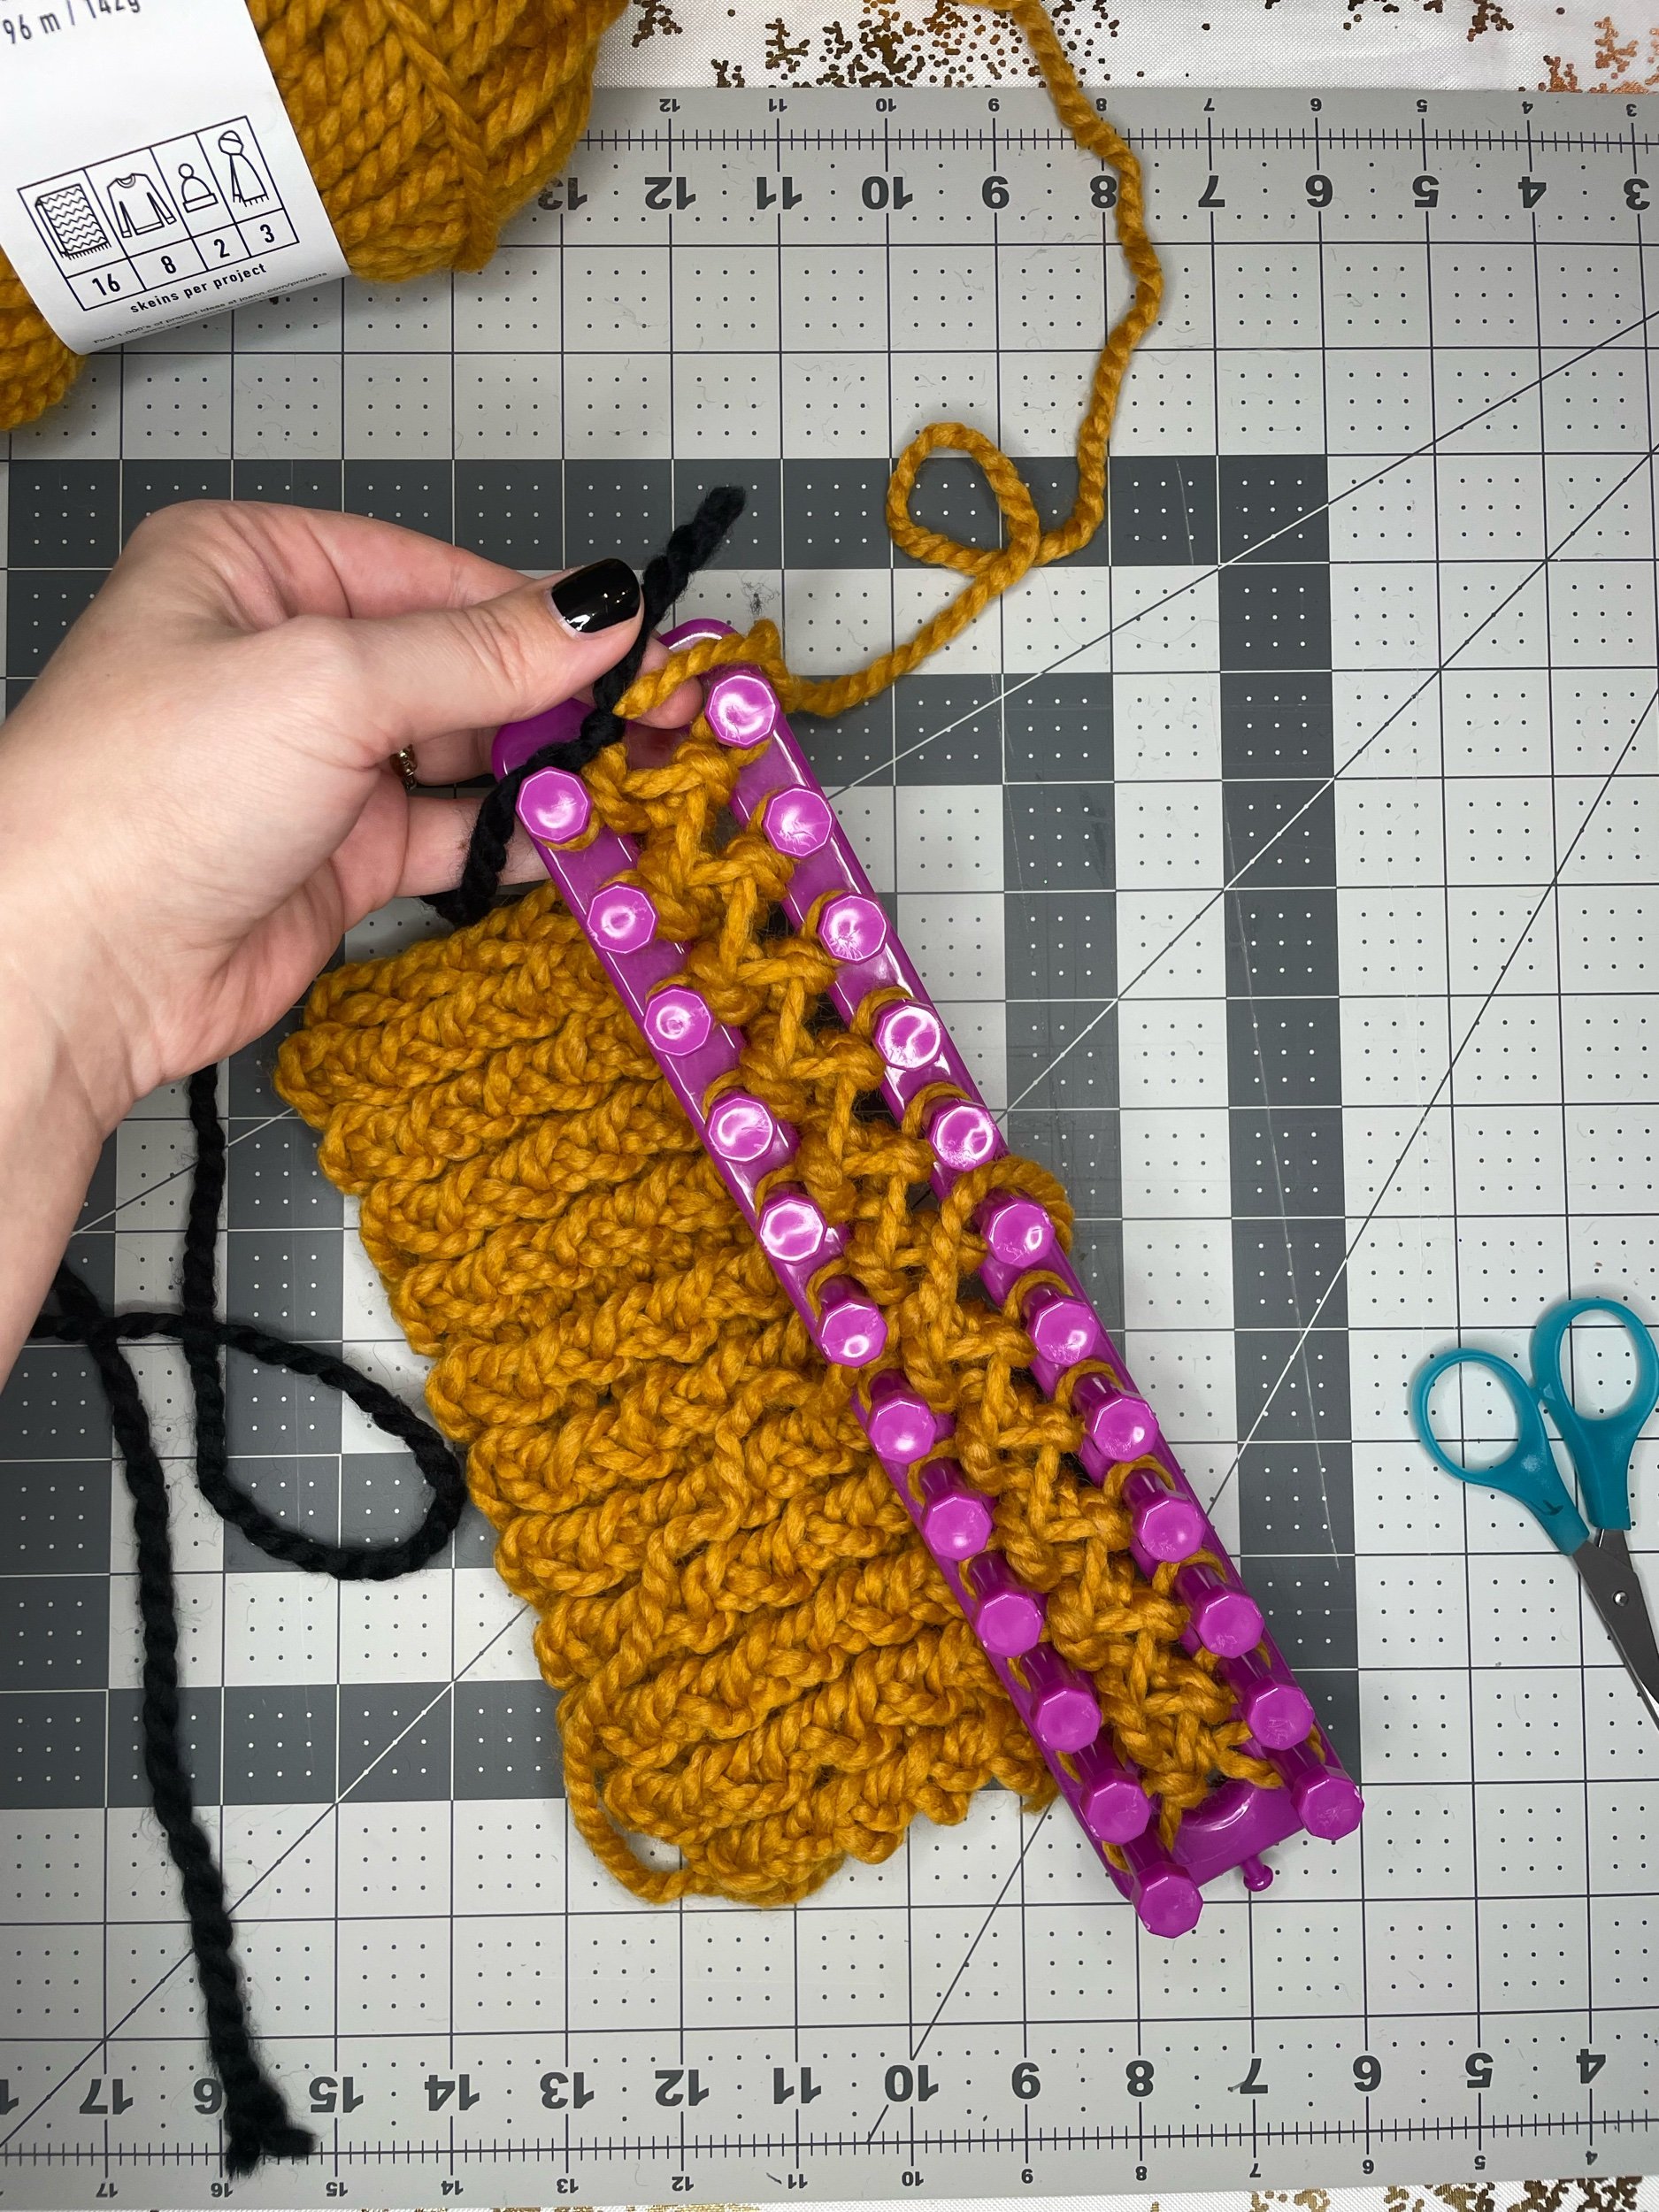
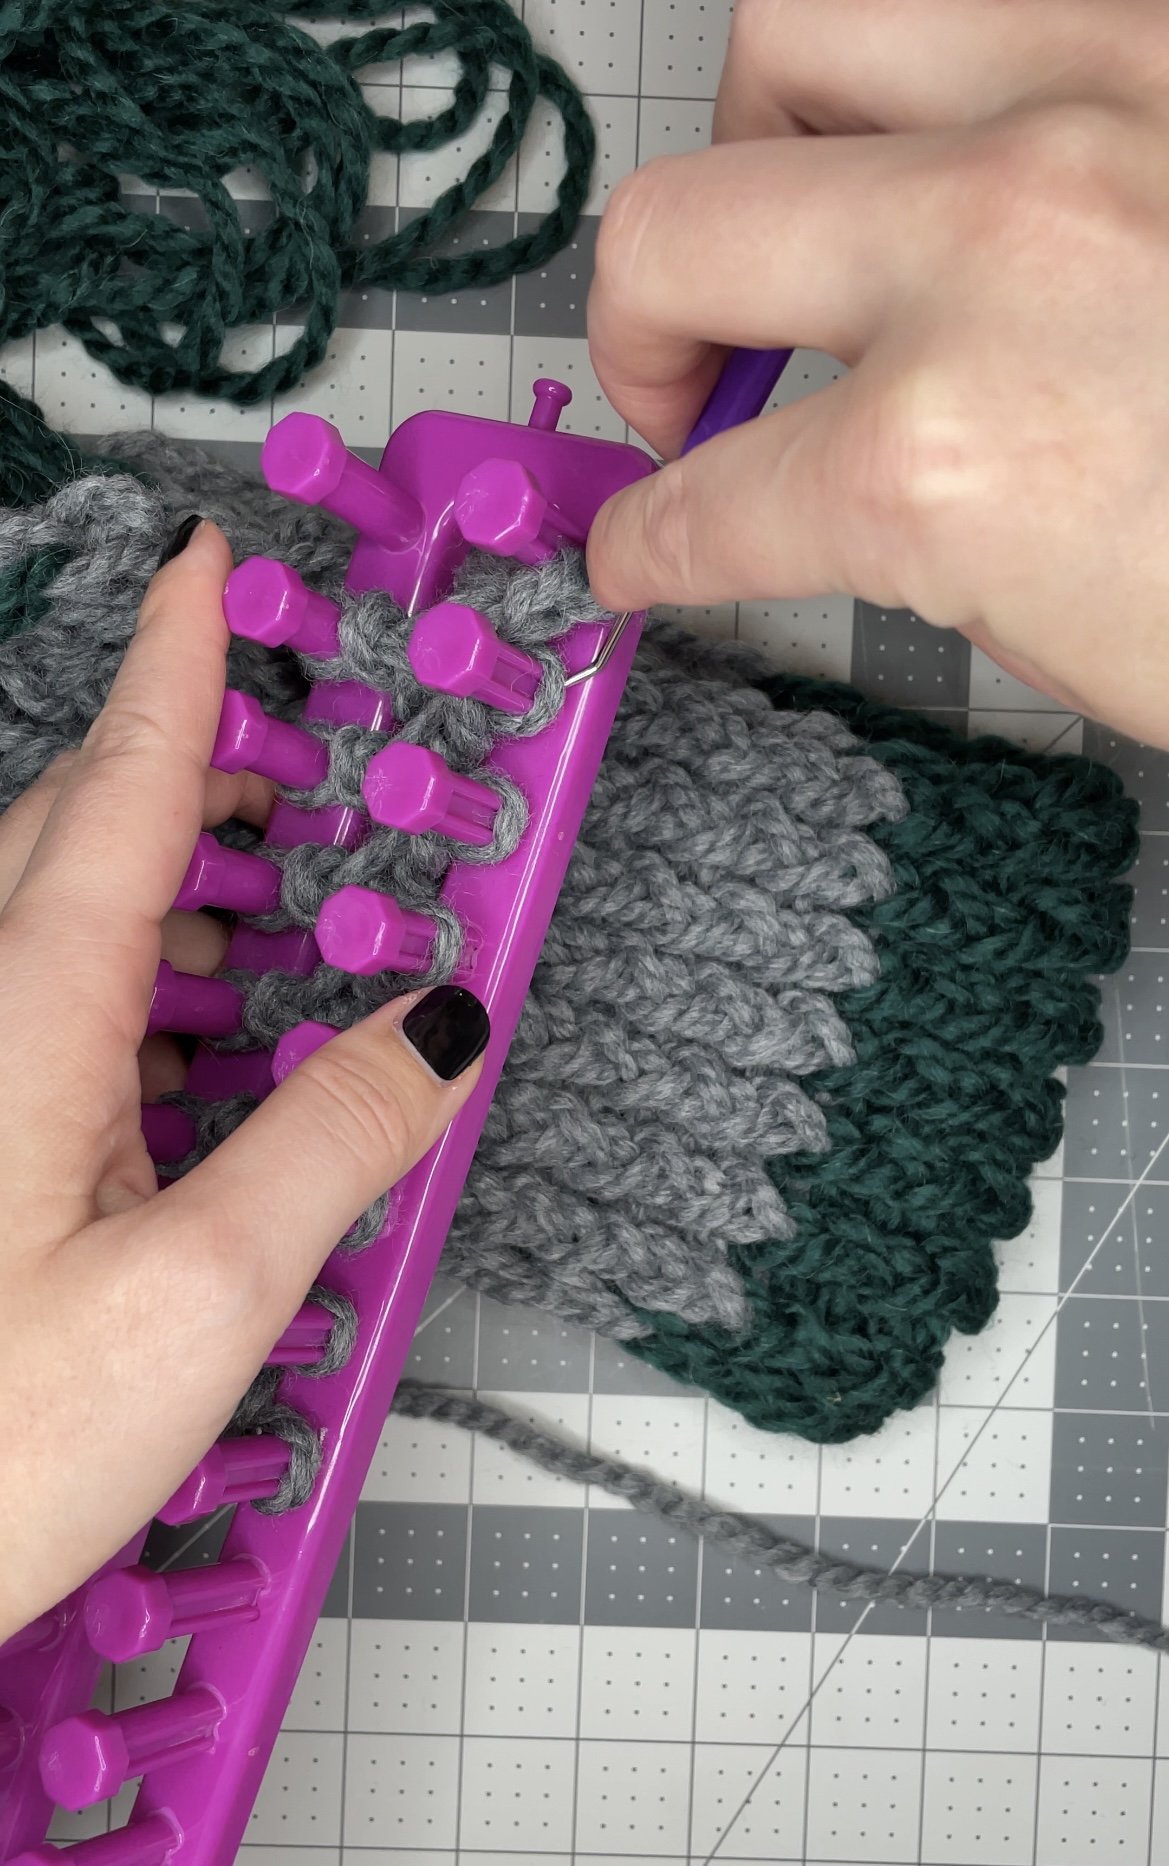
Step 13:
Release the bottom loops to create the first row of stitches.
To do this, I grabbed my crochet hook, took the bottom loop, pulled it over the top of peg 1, and released it.
I continued releasing all the bottom stitches in the same manner.
*Peg 24 did not have a bottom stitch to release, so it gets skipped.
(See images below)


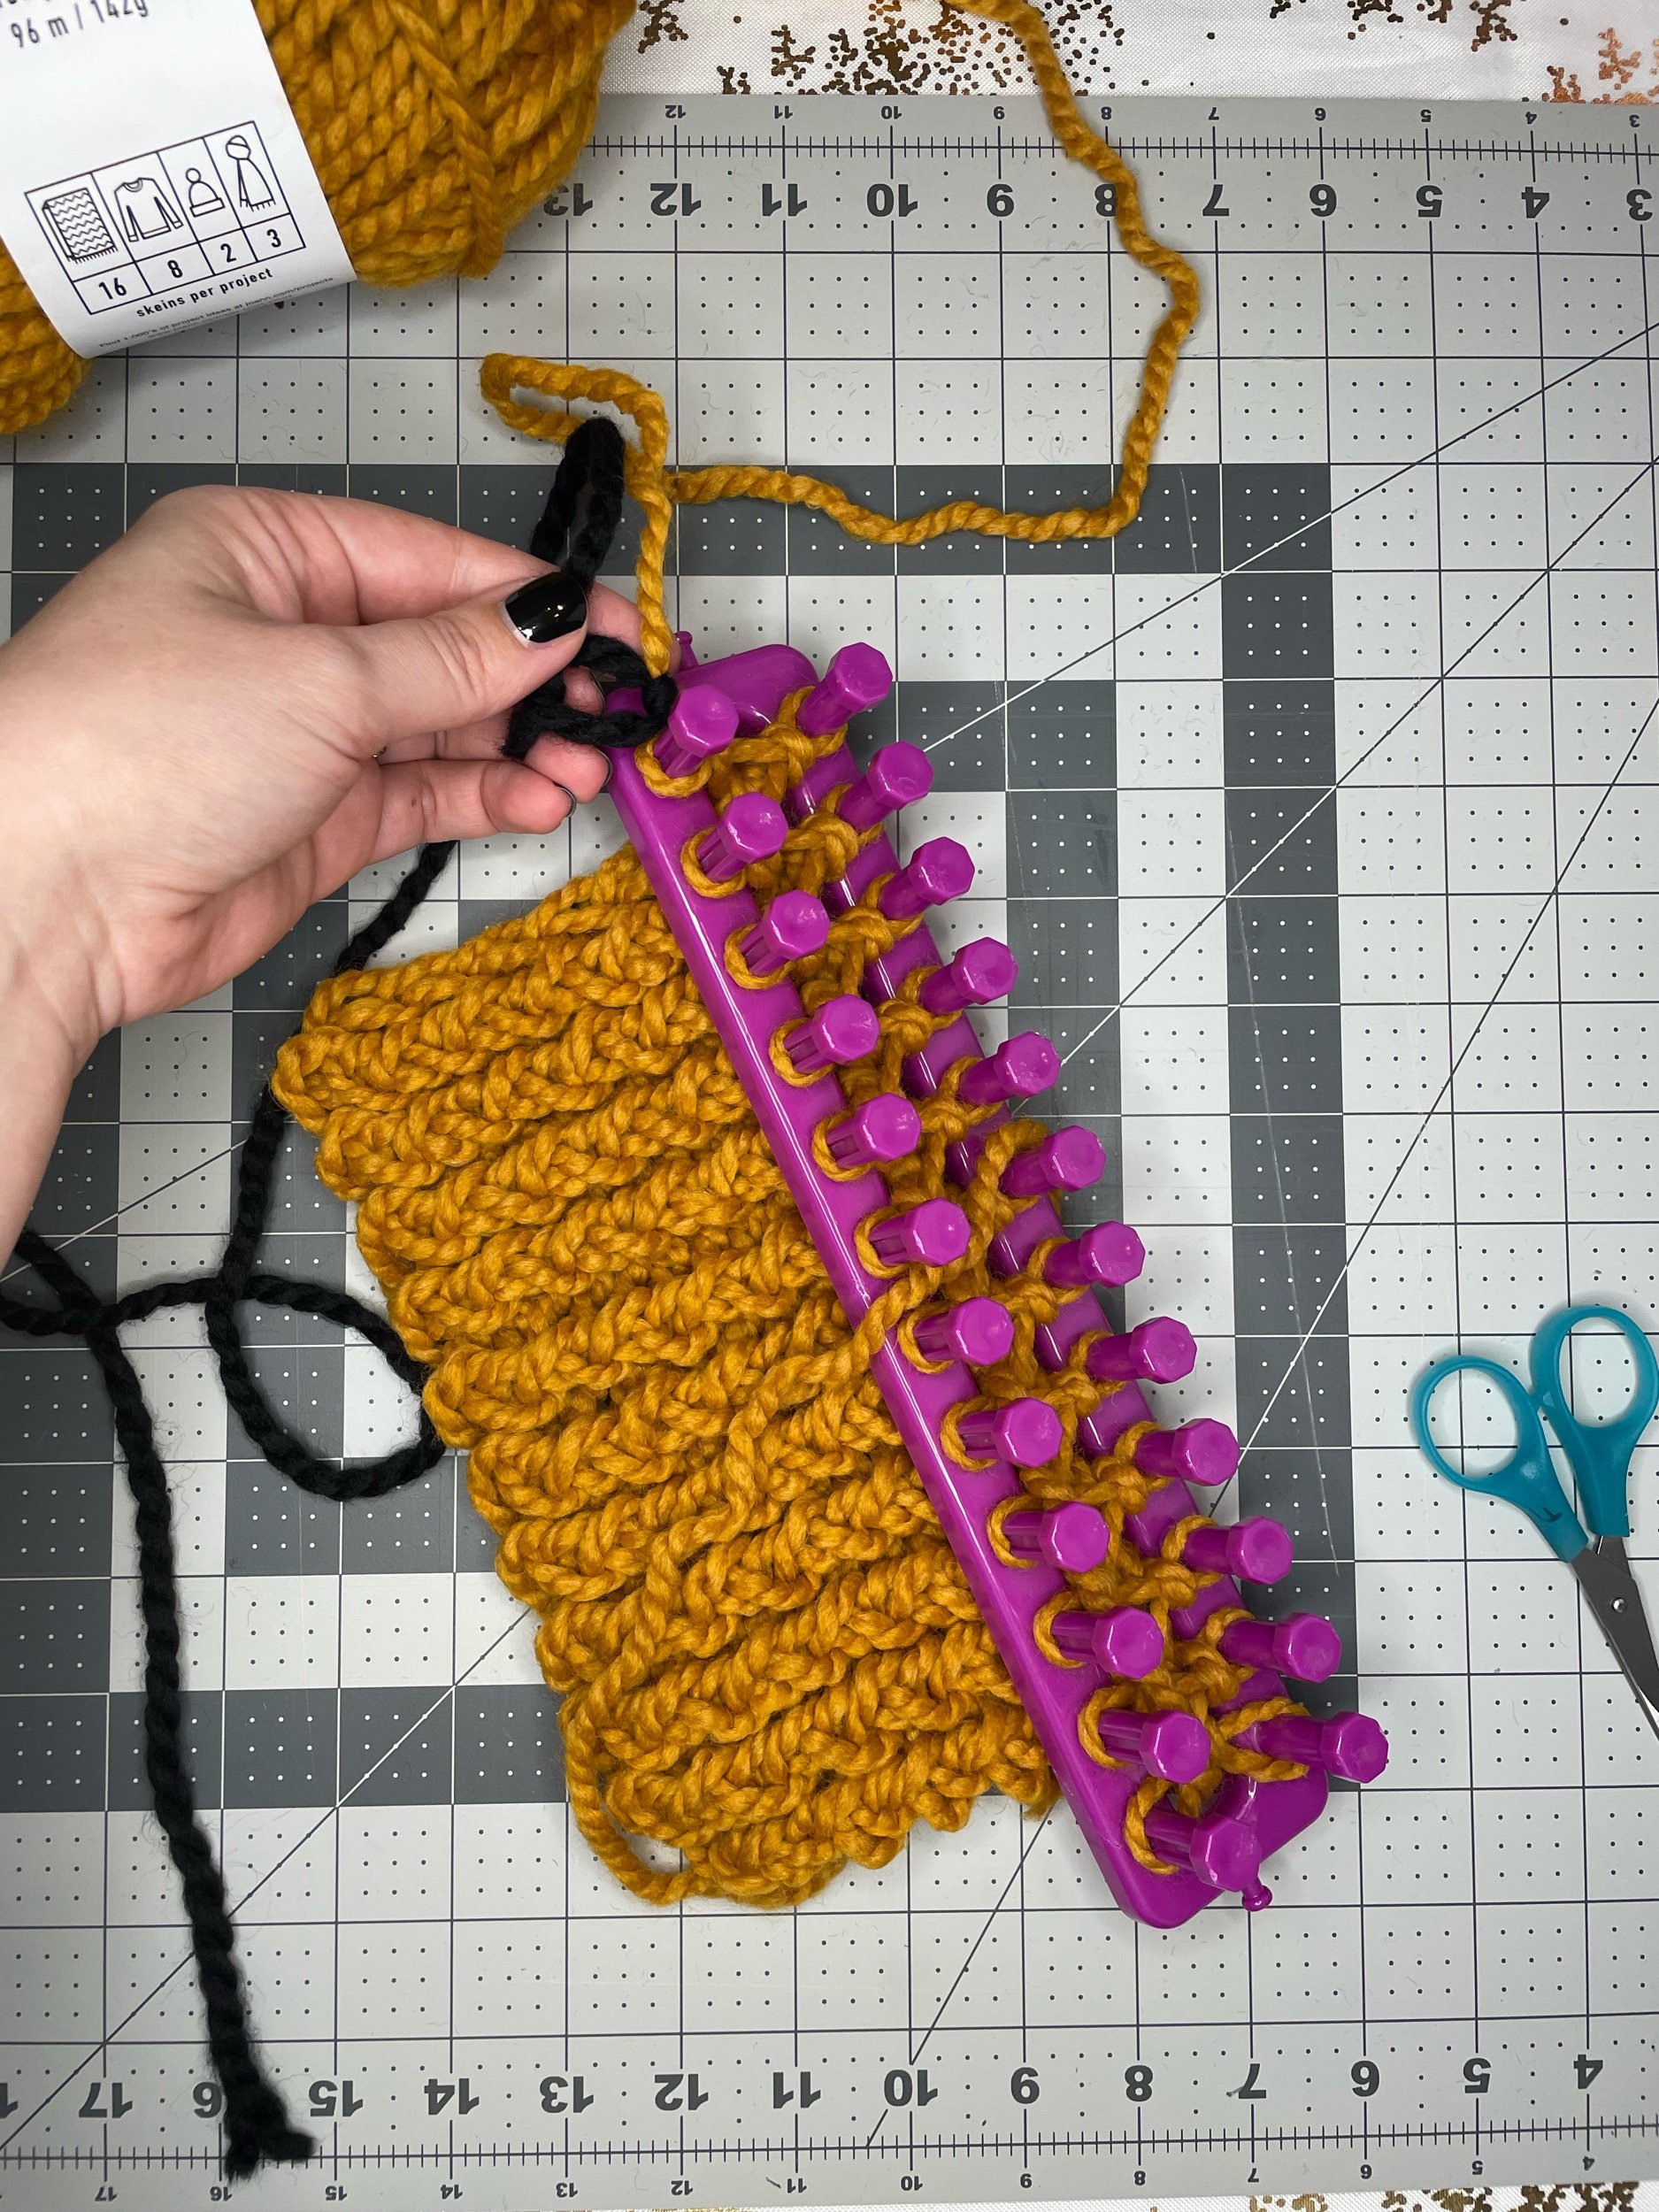
Step 14:
Push the yarn down.
As you work, you will see your scarf come out of the bottom of the loom.

Step 15:
Work the yarn back UP the loom.
Repeat steps 4-14 (the first peg will be wrapped from the previous step).
***When you are working your way UP the loom, peg 1 will only have one loop. When you are working your way DOWN the loom, peg 24 will only have one loop.

Step 16:
Continue this process until the scarf measures 60”-65”. Be sure to change the yarn every 15th row to achieve the even stripes!
To change the yarn, I tied the new color around the end of the yarn currently on the loom. I used a double knit to secure it. Then, I trimmed the tails.
Alternatively, you can weave the tails into the scarf at the end, but I find this way works just fine.
I made my scarves with 9 yarn changes, with each section 15 rows long.
Once the scarf is the desired length, you will stop with a single loop on each peg.
***I have switched scarves for this next portion. I made this Slytherin scarf for a toddler so I didn’t utilize the full loom. That being said, the process is still the same.


Step 17:
Cast off the scarf, making sure you leave roughly 20” of yarn as a tail to finish the scarf.
This process is the trickiest part of the entire project. You essentially have to release the final loops into one another.
Basically, you start at peg 23, use the crochet hook to grab the loop. Keep the loop on your hook, move to peg 24, and release that loop onto your hook. You will now have two loops on your crochet hook.

Take the loop from the back (peg 23’s loop), pull it over the loop from peg 24, and release it into the center.

With peg 24’s loop on your hook, move to peg 21 and release the loop onto the crochet hook. Pull the loop from peg 24 (it should be in the back) over the loop from peg 21 and release it into the center.
Do this until your entire project is released.


Step 18:
Sew the ends of the scarf so the tails are hidden within the final row of stitches.
To do this, I took the tail (20” at the end) of my scarf and used a tapestry (yarn) needle to sew the ends.
I tried to weave my needle in each loop so that the seam blended in as best as possible.
I also like to put a knot in the yarn halfway through stitching to help secure the tail.


Optional Step:
To give the scarf an added touch, I embellished it with a small leather tag that had the house crest on it. Here are the crests I used for the leather tag.
I used my Circut to cut out the crest on gold vinyl iron-on. Then, I used my sewing machine to stitch the tag into the scarf. This was a fiddly process, but I think it made the scarf a touch more luxurious.
That’s it!
The scarf is complete!


Top Tips…
Each loom is built for different weights of yarn. Make sure you pick a weight that matches your loom.
This loom was made for a medium to bulky weight; however, I was able to use a lightweight yarn. I just had to double up, meaning that I had two pieces of yarn I wove simultaneously (similar to the cast-off video).
I found that I needed roughly 2 skeins of yarn to make 1 scarf.
Here are the following yarns I used this past season:
Gryffindor - 1 skein Lion Brand Wool Ease, color Cranberry, and 1 skein Big Twist Natural Blend, color mustard
Hufflepuff- 1 skein Big Twist Natural Blend, color mustard, and 1 skein Lion Brand Wool Ease, color black
Ravenclaw- 1 skein Big Twist Natural Blend, color medium grey, and 1 skein Big Twist Natural Blend, color navy
Slytherin- 1 skein Lion Brand Wool Ease, color black, and KC Premium yarn, color evergreen
The fluffier the yarn, the less noticeable your stitches will be.
You can label each peg if it makes you feel more confident.
Final thoughts…
I enjoyed this process so much! I find loom knitting to be incredibly relaxing and therapeutic. It is a craft/skill I would recommend to anyone!
My children love my scarf (and matching hat) so much that they wanted their own. I told them I couldn’t make them just yet, but I already did!
I can’t want to see their faces Christmas morning when they finally open them!
Oh! I mentioned a matching hat…that blog is coming next week so stay tuned!
I really hope you enjoyed this make! If you did please consider subscribing to my newsletter, so you never miss a new project!
Remember, if you make this project make sure to tag me with #darkkflurdesigns so I can see your creations!
Until next time…