
How to Make Patronus Shadow Box
Looking to make a beautiful gift for the Harry Potter fan in your life?
Or maybe you want a piece of art to place on your bookshelf!
These Patronus shadow boxes will add a touch of magic to any space!
Harry Potter Craft Book Review
When I first found the Harry Potter Craft Book, I knew I had to have it.
1. Because I am a huge Harry Potter fan.
2. Because I love crafting!
So naturally, I impulse bought the book.
I was delighted to see the wide range of projects the book had broken down.
I have tackled a few projects from the Harry Potter Craft Book and there are still several more I want to try out.
The book comes with everything you need to make your own concoction of Harry Potter-themed projects. They even include templates and printed pieces in the back of the book for certain projects which is magical! (This would be a fantastic gift for the Harry Potter fan in your life!)
I will be attempting a few more projects from this book as the year goes on, so stay tuned to see more from this book!
I selected the first few projects because I thought it captured a wide range of available projects and showcased the varying skills required for each project.
You can find the how-to-make potions bottles here, along with my own versions here and here, and I’m currently working on the monster book. But I digress…
This week, I wanted to try the Patronus shadow box.
I was not disappointed with the final result, but it took me a few tries to get there. I will show you how I did it and what I would or wouldn’t do next time.
Let’s begin…
This post contains affiliate links. Read my full disclosure for more info.
List of Supplies:
Makes; 1 Shadow box
Estimated time: 45 minutes to 1 hour
Skill Level: Beginner with a cutting machine, Intermediate without a cutting machine
White card stock
Shadow box (I used a 9x9, they used a 12x12)
LED lights (I got mine from Amazon)
1/4 dowel rods
Scissors or miter box
Tape
Foam mounting adhesive strips (I got mine from the Dollar Store)
Cutting machine (ie Cricut)
If you don’t have a cutting machine, you will have to use tracing paper.
X-Acto knife (if not using a cutting machine)

Step 1:
Gather the supplies.

Step 2:
Cut out the individual scenes.
To do this, I took a photo of the images provided in the book and uploaded them to my Cricut. Then, I let my machine do all the heavy work.
If you don’t have a cutting machine, the book suggests using tracing paper to copy the images. Then, transferring the markings to cardstock and cutting them out.
I would recommend taking a photo, enlarging the image to the correct size, placing the printed image on top of the cardstock, and cutting it out.
*I cannot provide you with images due to copyright protection. If you would like to make a scene that is similar to this one, you can try your hand at designing your own or you can purchase the book and make this one!

Step 3:
Assemble the pieces and tape wooden dowels as spacers to the back of the first, second, and third scenes.
To do this, I used my miter box to cut my dowel into 2” pieces. Then, I use tape to secure the wooden dowel pieces at a 45-degree angle in the corners. I did this on the back of the first second and third pieces.

I had tried to use mounting foam first, but I found that this did not provide enough depth so I disassembled it and tried again.

Step 4:
Use foam mounting strips to mount the Deathly Hallows symbol onto a plain piece of cardstock.
To do this, I cut small pieces of mounting tape and placed them at the top middle, and bottom sections to ensure the image stayed puffed out.
*Again, this was a piece I had made with only mounting tape but didn’t like.

Step 5:
Layer the scenes into the shadow box. Starting with the first scene.
To do this I simply laid my shadow box face down and placed each piece in one at a time, also face down. I left the last scene to the side so I can place the lights in the box.

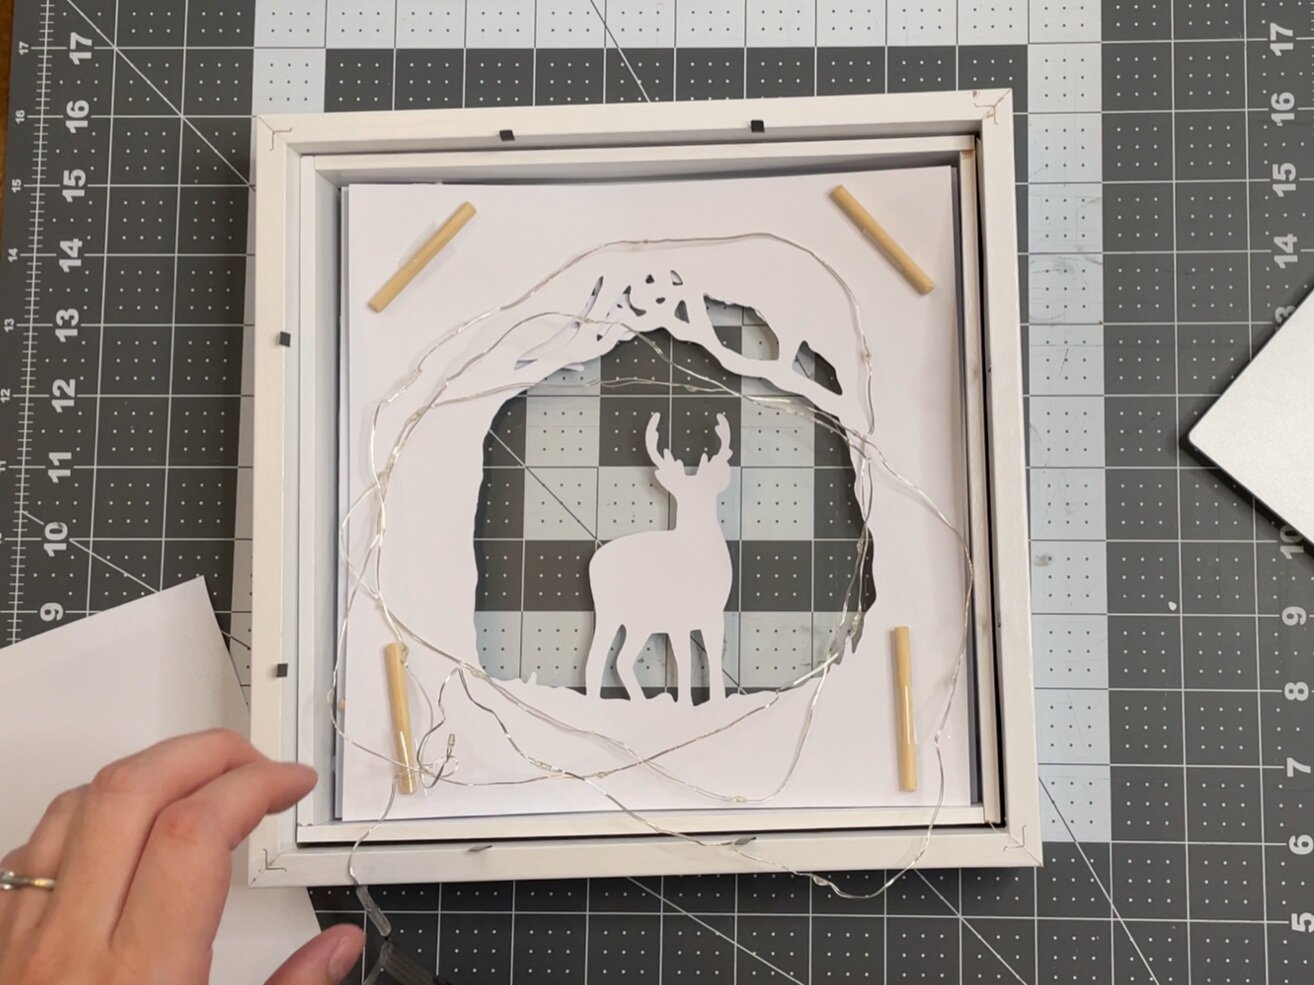
Step 6:
Add in LED lights around the perimeter of the box, place the final scene and close the shadow box.
To do this, I wrapped my LED lights in a circle, then placed them in the box. I ended up securing them with a small piece of tape. After that, I placed my final scene face down and closed the box.

I also added a small piece of tape to secure the switch to the back of the box.
That’s it!
The shadow box is complete.

Top Tips…
The mounting foam did not work in my experience. Even two layers did not give me the correct depth.
Wooden dowels are the best option to get the correct spacing.
I recommend alternating the wooden dowel placement between the corners and the center (bottom and top). This will help give the cardstock some more stability.
I used lightweight cardstock for this project, but I think a medium weight would hold up better.
The LED lights should be hidden completely. They will add some depth between the first three scenes and the last one.
Even though I used a 9'“x9” shadow box, the workable space is only 8.5”x8.5”
Next time,
This project looks so unbelievably stunning in person. I’m not sure the photos do it justice! I adore the 3D aspect of this piece.
It would look great on a bookshelf, wall, or anywhere your heart desires.
It would also make a fabulous gift for the Harry Potter fan in your life!
If I attempt this project again (and I might), I would try a few things differently.
First, I would experiment with the dowel placement. My final piece has a really good dimension.
That being said, the LED lights created a large gap between the last scene and the ones before it.
While I adore this look, it ended up pushing the first scenes together in spots where they were not supported by the dowels.
I would like to add additional supports to prevent any flattening from occurring.
Second, I would like to see this project in color, even if it’s only in greyscale. The piece is beautiful and clean in all white; however, I want to see what it would look like in color.
I think my designs in Cricut Design Space planted this curiosity in my head. Still, I want to experiment. Maybe with some glitter cardstock!!!
Finally, I want to try this with a medium-weight cardstock to see if that changes this project.
I imagine it would change it slightly but I’m not 100% sure. I’d like to see what it does.
Overall, I can’t wait to make this a gift for another fan! It’s a quick and simple make (if you have a cutting machine that does all the hard work for you!
I really hope you enjoyed this make! If you did please consider subscribing to my newsletter, so you never miss a new project!
Remember, if you make this project make sure to tag me with #darkkflurdesigns so I can see your creations!
Until next time…