
Fabric Gift Bag: Traditional Style
Are you tired of spending money year after year on paper bags that rip and tear?
Do you love the look of traditional paper bags, but haven’t found a way to replicate it?
These super-simple fabric gift bags can be customized to have a high-end look and won’t break into your budget!
Find out how easy these are to make!


Searching for that perfect bag…
In my family, we have a tradition where we exchange pajamas on Christmas Eve. And this year, I decided to invest in sturdy decorative boxes that we can use year after year.
And that simple switch sent me on a quest to find a suitable gift bag that I could use for years to come.
Take a minute to think about how much money you actually spend on those flimsy cardboard boxes and paper gift bags each year…
Sure, you can shop at the Dollar Store and get packaging for cheap or you can ask the department store for gift boxes with your purchase. You can even buy a higher quality set and reuse them for a few years. And most of the time, you won’t get your packaging back unless you specifically ask for it.
But cheap boxes still end up costing around $1 a box and the gift bags range from $2-$7 depending on the size and detailing. And don’t forget wrapping and tissue paper (both run between $1-$10)! Then there are ribbons, bows, and gift tags…
So if you have a large family, like mine, and box and bag over 20 gifts, it can cost you roughly $25-$100+ depending on how you package your gifts and how many you have.
I don’t know about you, but I could use that money to buy each of my kids another gift! Or you could treat yourself to something special with that money!
With that in mind, I decided to make a change in my budget for how much money I was willing to spend on the packaging for Christmas presents.
I searched the internet for a fabric gift bag that imitated the traditional gift bags that I loved. There’s something in that folded triangle corner that really appeals to me…I may just be a bit crazy!
I came across several options, but I’m going to share the one I found most effective.
If you are interested in reading about things I would do differently next time, hot tips, and other ideas for this project, read on after my instructions.
This post contains affiliate links. Read my full disclosure for more info.
List of Supplies:
Makes: This is entirely dependent on the amount of fabric you buy and the size of your bag.
Estimated Time: 20-30 minutes per bag
Sewing skills needed/used: Straight stitch, Slip stitch
Skill level: Beginner to advanced beginner
***I purchased 1-2 yards of six different types of fabrics and used them to make a variety of bags. All of my fabric was 50% off (between $4-$6 per yard).***
For this tutorial, I will use the dimensions I drafted my bags out of. You can alter the amounts depending on how many bags you wish to make and the sizes you want them to be.
At least 1/2 yard of outer fabric
At least 1/2 yard of lining fabric
At least 1/2 yard of fusible fleece
Small pieces of interfacing (two strips measuring 8” x 2”)
Needle
Coordinating thread
Sewing Machine
Ruler
Fabric pins or clips
How to make a traditional gift bag…
Step 1:
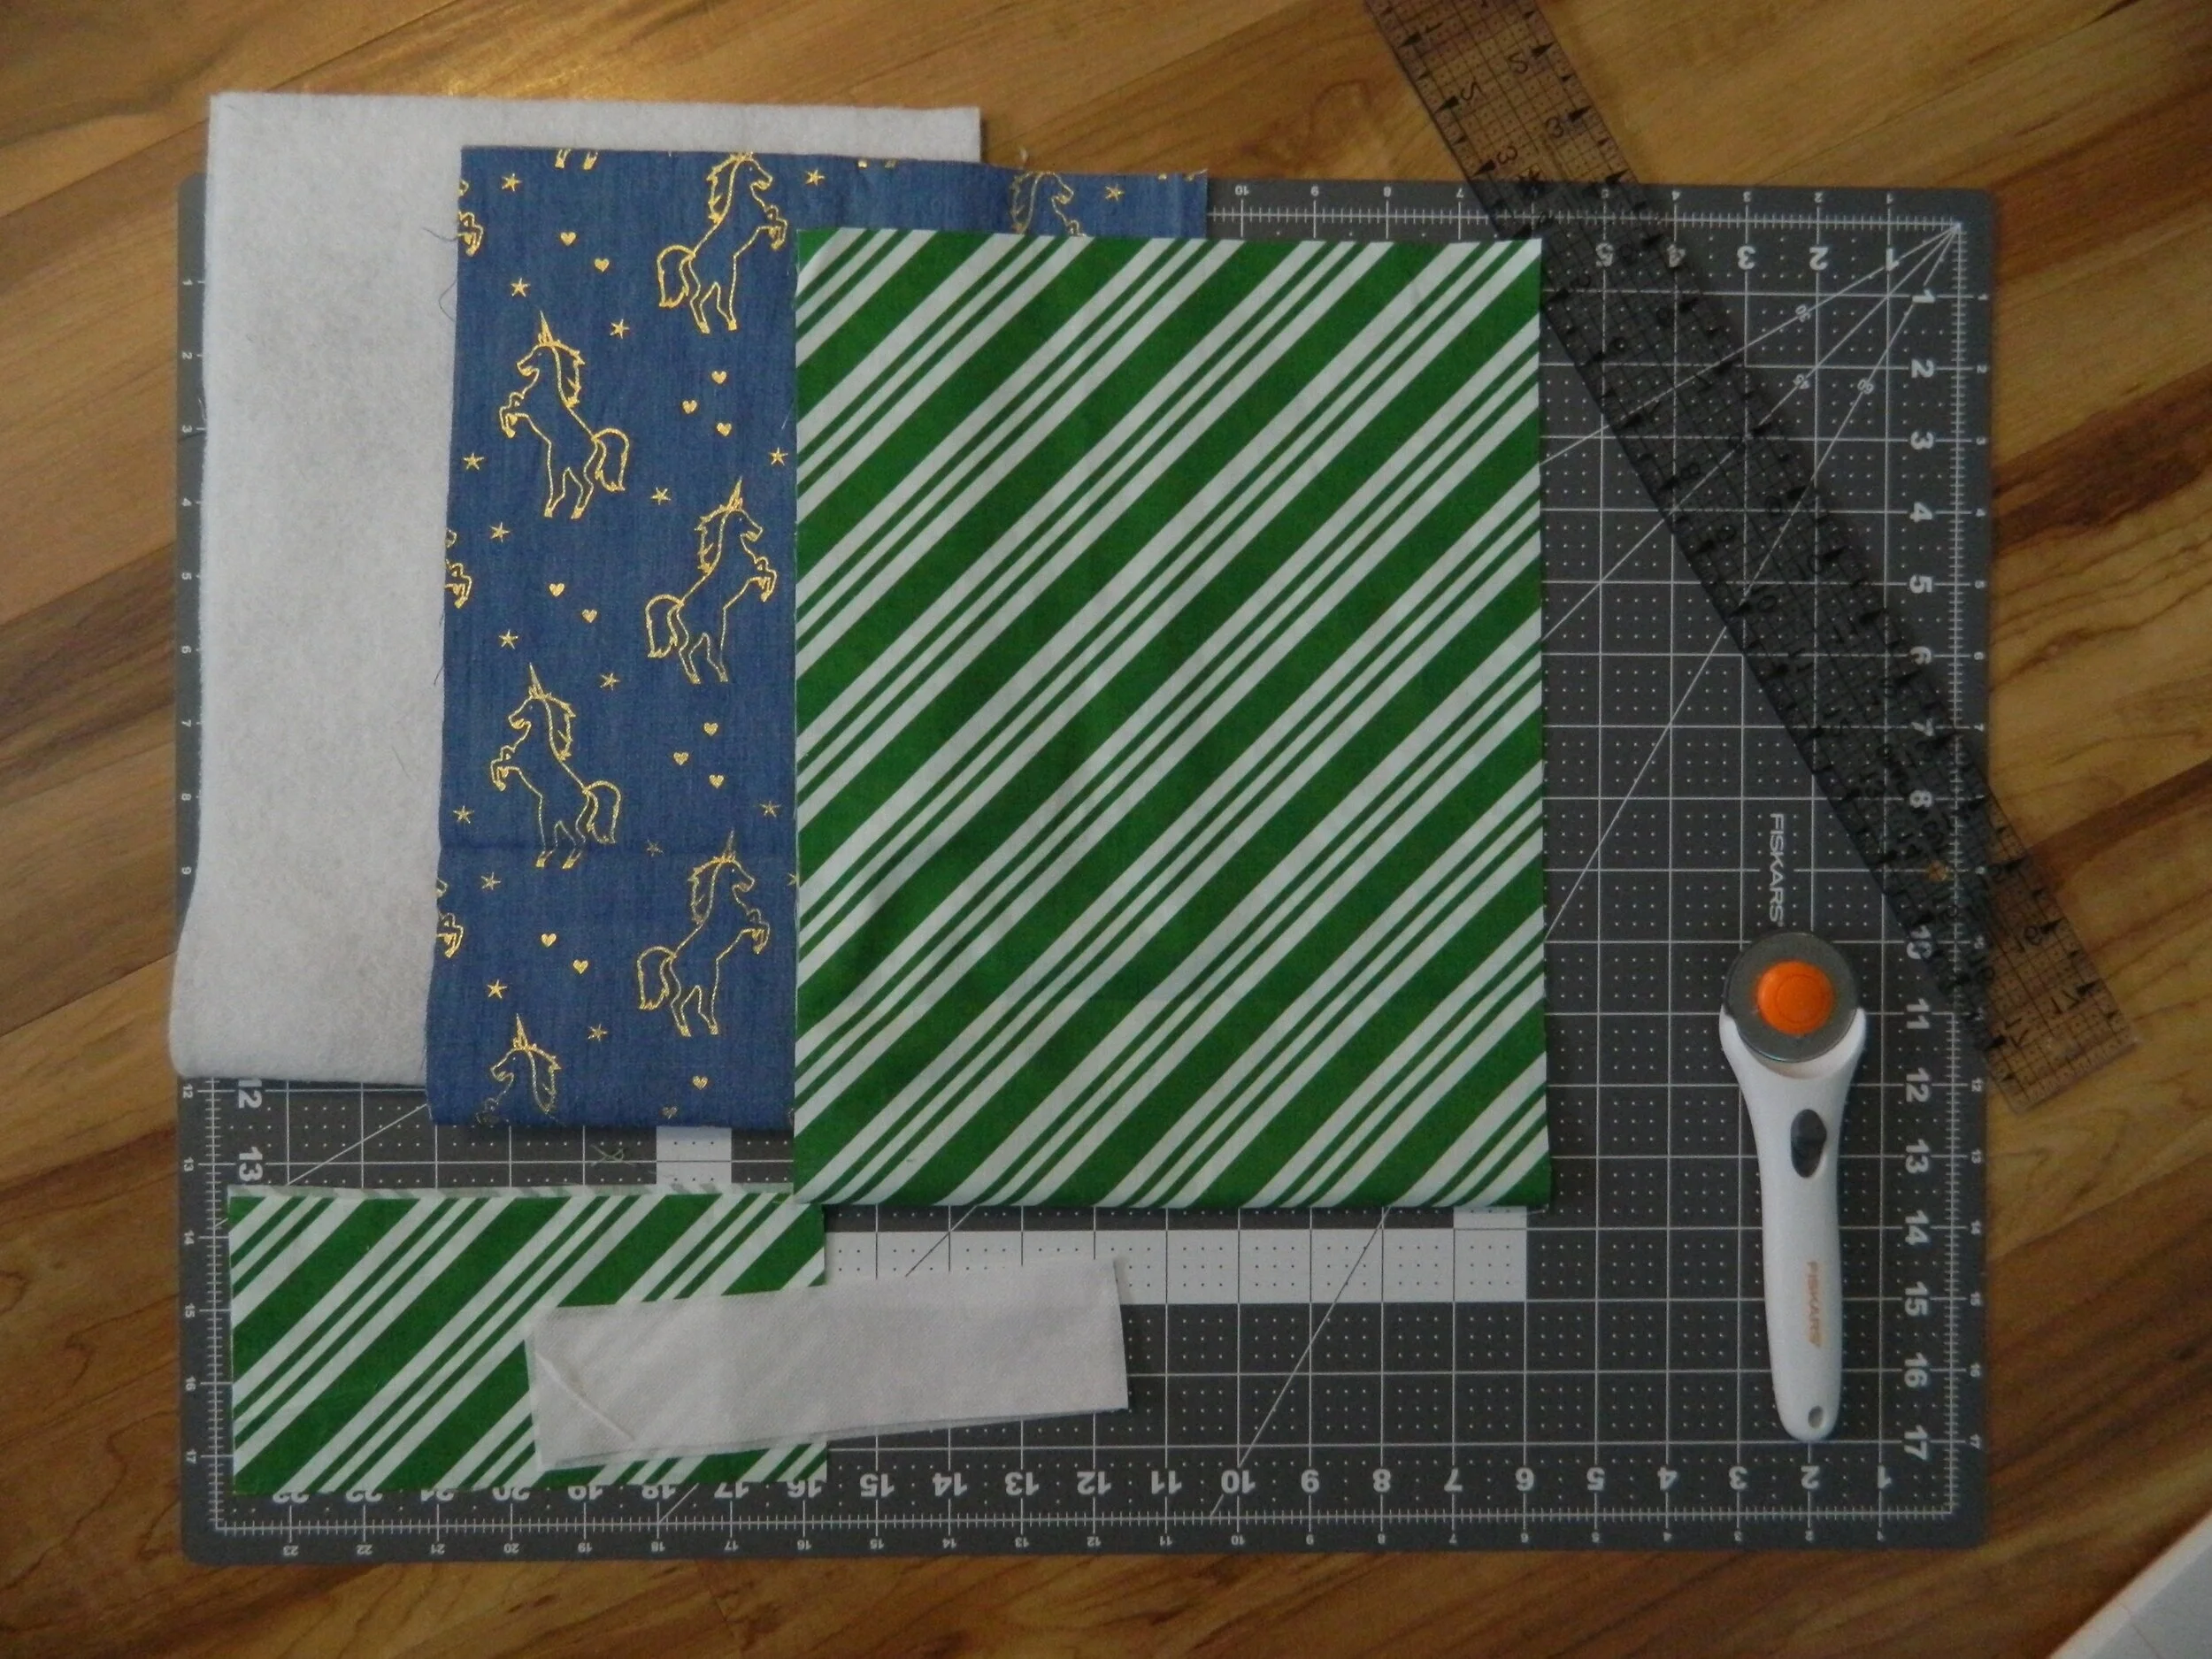
Cut out your outer fabric, lining fabric, handles, interfacing, and fusible fleece.
The dimensions I used for my bag were the following:
Outer fabric, lining fabric, and fusible fleece 26” x 10”
***I like to cut my length on the fold. I measured 13” up from the center fold and cut it there.
Handle 8” x 4”
Interfacing 8” x 2”

***If you have a directional fabric, your pattern will be upside down on one side.
(I picked this fabric with my daughter in mind.)

Step 2:
Apply your fusible fleece to the WRONG side of your outer fabric.
Make sure your glue interfacing (the bumpy side) is facing the WRONG side of the fabric.

Step 3:
Apply your interfacing to the WRONG side of your handles.
You want to place your interfacing in the center of the handle. You should have 1” above and below the interfacing

Fold and press the edges of your handle in until they meet the interfacing (top).
Then, fold and press your handle in half (bottom).

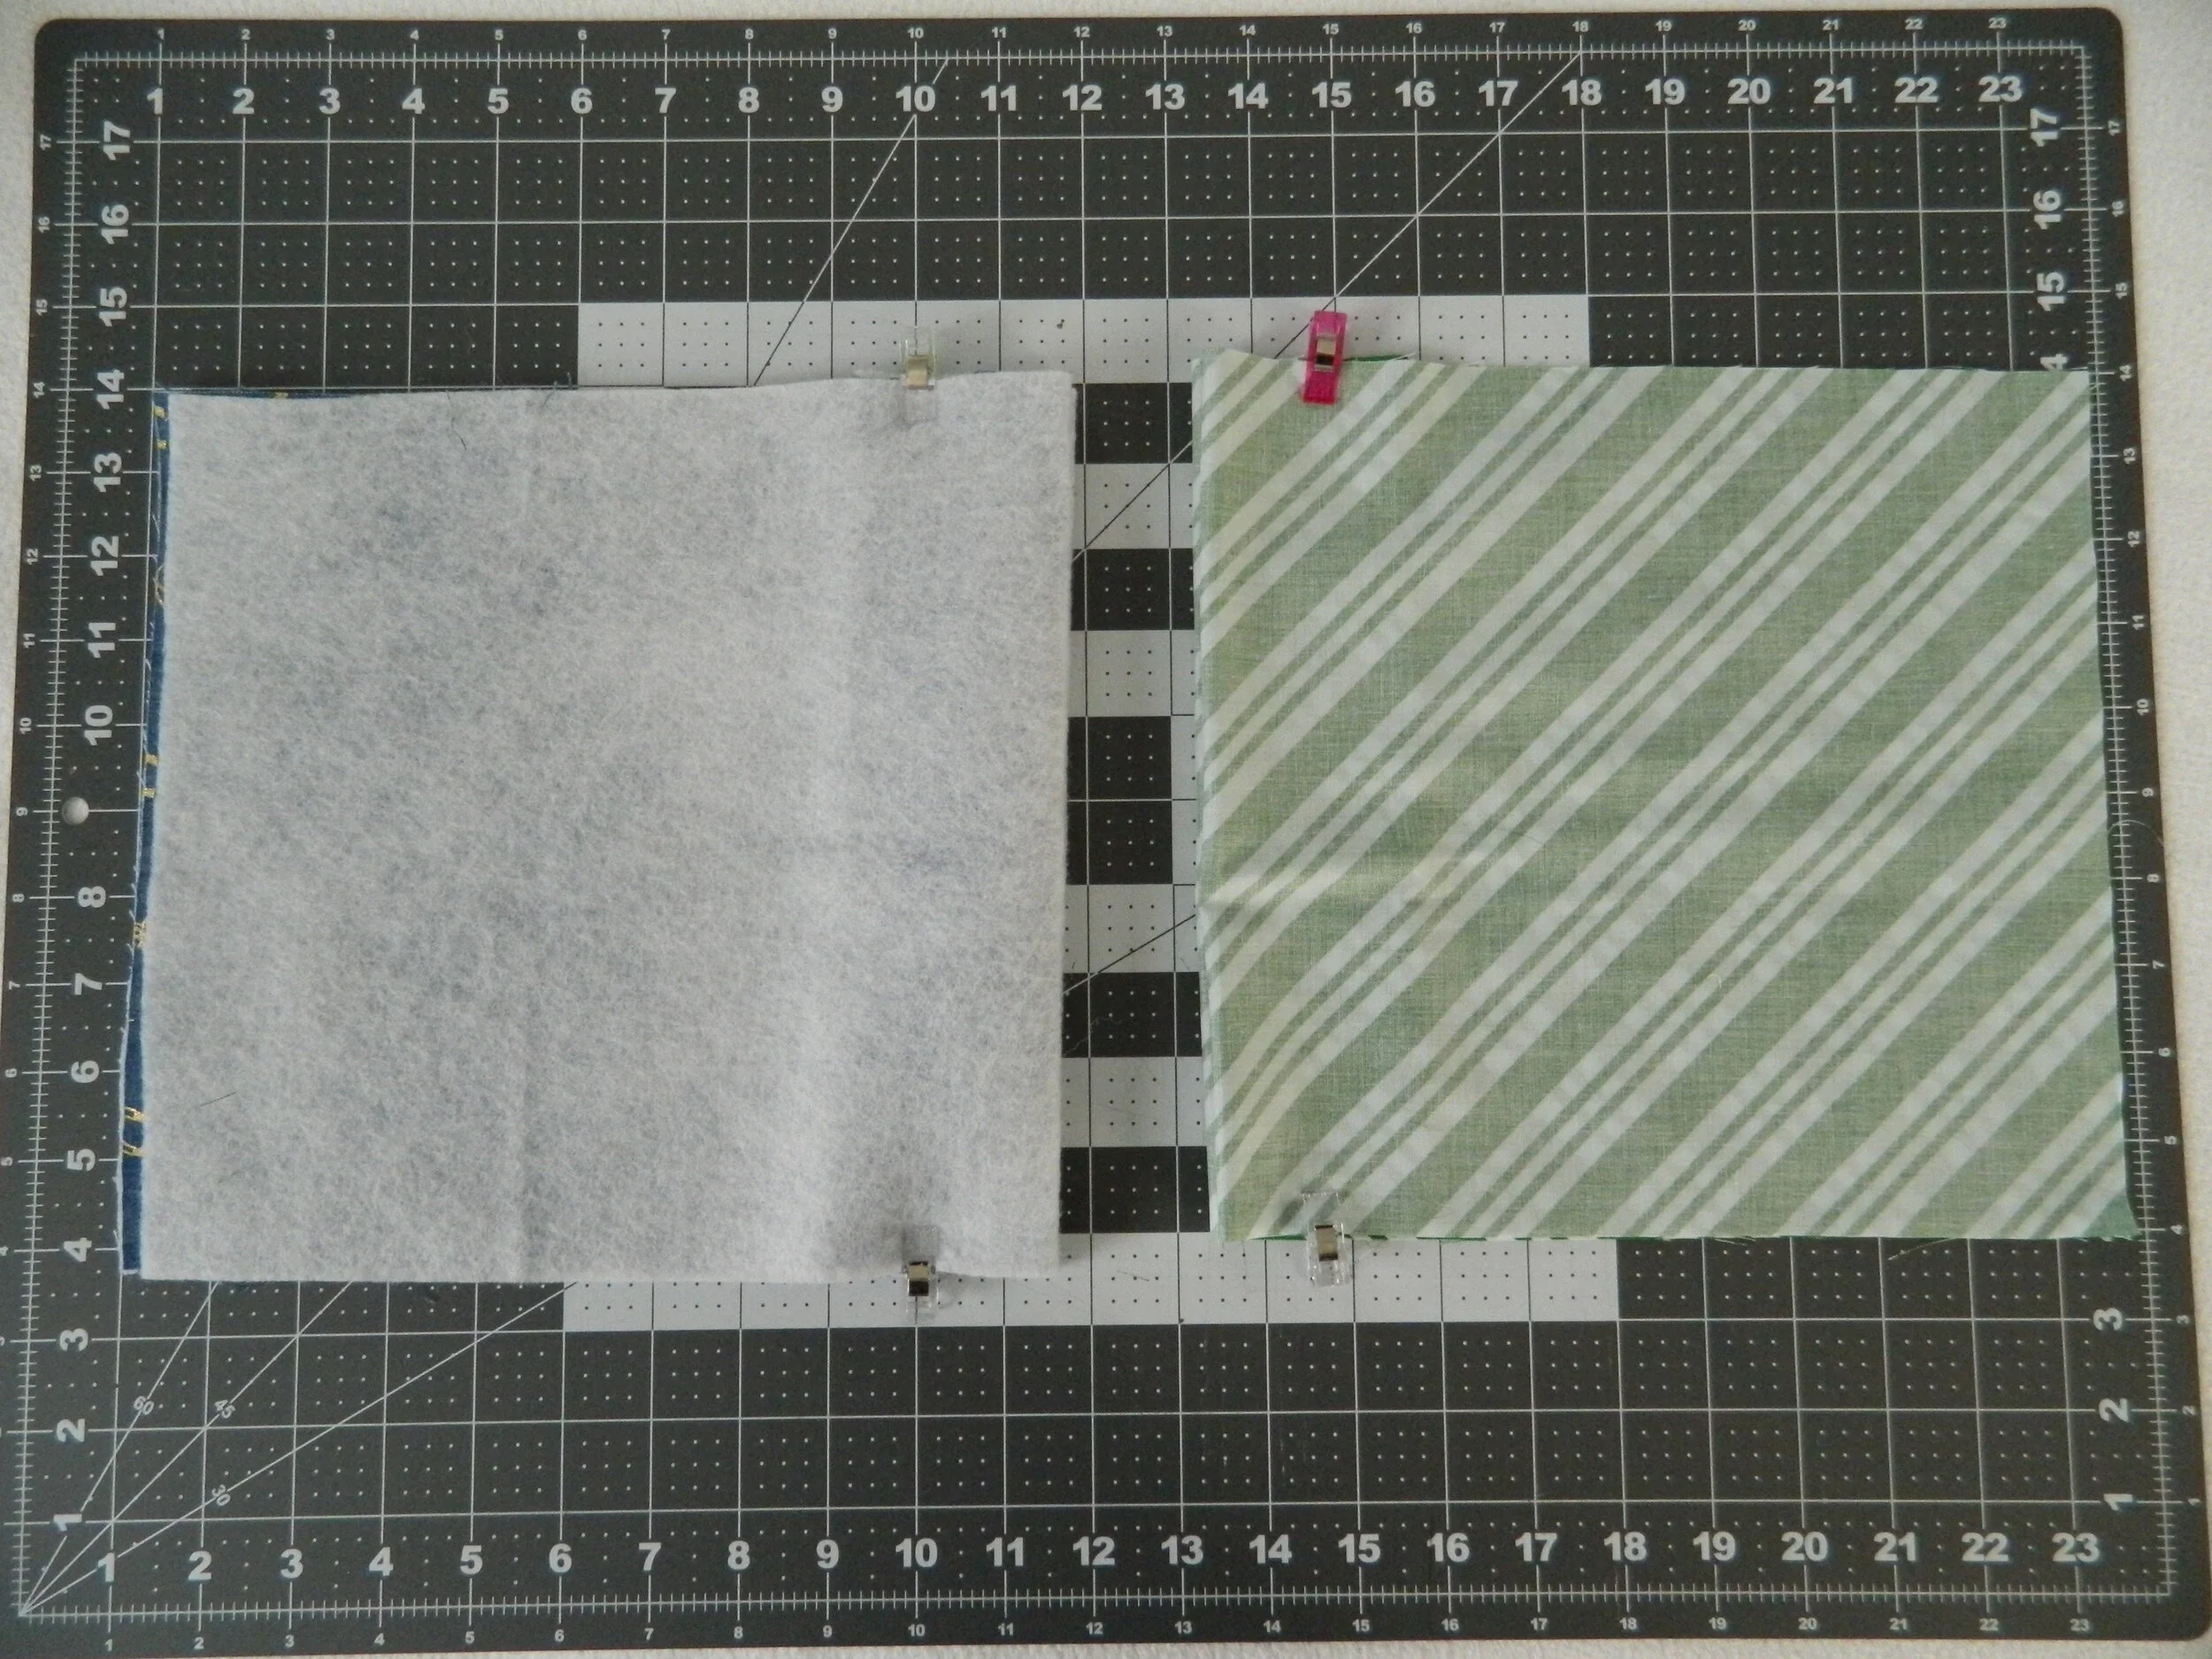
Step 4:
This is the magic/tricky part where you will determine how big the bottom of your box will be.
You will need to start with your lining fabric folded with the WRONG sides together.
I will refer to this fold as the center fold for the next few processes.

Then you need to create a fold 2 1/2” from the center fold.
Do this by taking the top of your bag and folding it down towards your base.
I placed a ruler at one side to make sure my measurement was correct then clipped that side in place before moving to the other side and repeating the process.
***It’s going to look like a little ‘V’ when it is clipped or pinned down.
I used the following measurement:
2 1/2“ fold to achieve a 5” base.
Basically, take your desired width and cut it in half.
For example: If you want a 3” base, you only need to create a fold 1 1/2” from the center fold.

Flip your outer fabric over and repeat this process on the other side.
When this process is complete, the RIGHT sides of your fabric will be facing each other and the WRONG sides will be facing you.
The base of your bag should be pinned or clipped to look like little ‘M’.
***Make sure your folds are aligned, otherwise your base will not be squared off.


Step 5:
Repeat this process for your outer fabric.
When you are done, both pieces should be RIGHT sides together.

Step 6:
We are officially moving to the sewing machine!!
Sew the bottom (the open side) of your handle closed around 1/8” to 1/4” from the edge. This will ensure that your handle does not come apart while it is on the bag!
***You can sew along the edges of both sides for a uniform look.

Step 7:
Pin your handles to the top of the outer fabric.
Do this by measuring in 3 1/2” from the edge of the bag and place the center of your handle at that point. Pin in place.
Repeat this process for the other side.
The loop of your handle should be face down.
Repeat this process for the other side of the bag.


Step 8:
Sew the top edge of your outer fabric to the top edge of your lining fabric using a 1/4” seam allowance.
To do this, place your outer fabric (with the handles pinned in place) RIGHT side up.
Then, place your lining fabric face DOWN on to your outer fabric, making sure you line up the top edge of your fabric.
Pin and sew the top edges (pictured below).
***I forgot to pin my handles in place when I took these pictures and it resulted in me having to unpick these stitches; don’t be like me!


Step 9:
Sew along the side seams of your bag using a 1/4” seam allowance, leaving a small gap in the lining for turning.
To do this, grip the bottom of your bag (the folded parts) and pull gently until your top seams meet in the middle of your bag.
Make sure your top seams are perfectly aligned. This is a seam that people will notice, so you want it to be aligned!
Don’t Forget: Leave a small gap on one side of the lining so you can turn the bag.


Step 10:
Turn your bag and sew across the top edge roughly 1/4” from the edge.
To do this, slowly work your fabric through the small hole you left in the lining.

Smooth out your bag and work the corners into the correct shape.
At this point you have two options:
Option 1 - Work your lining fabric into the bag so the top edge of your outer fabric is flush to the top.
This will make your handles stand up.
OR
Option 2 - Work your lining fabric so it has roughly 1/4” to 1/2” peaking out of the top (as pictured).
This will make your handles sit down.

Step 11:
Slip stitch your lining closed.
You could simply fold this and run it through your machine, but I find that this closure makes the bag appear more professional.

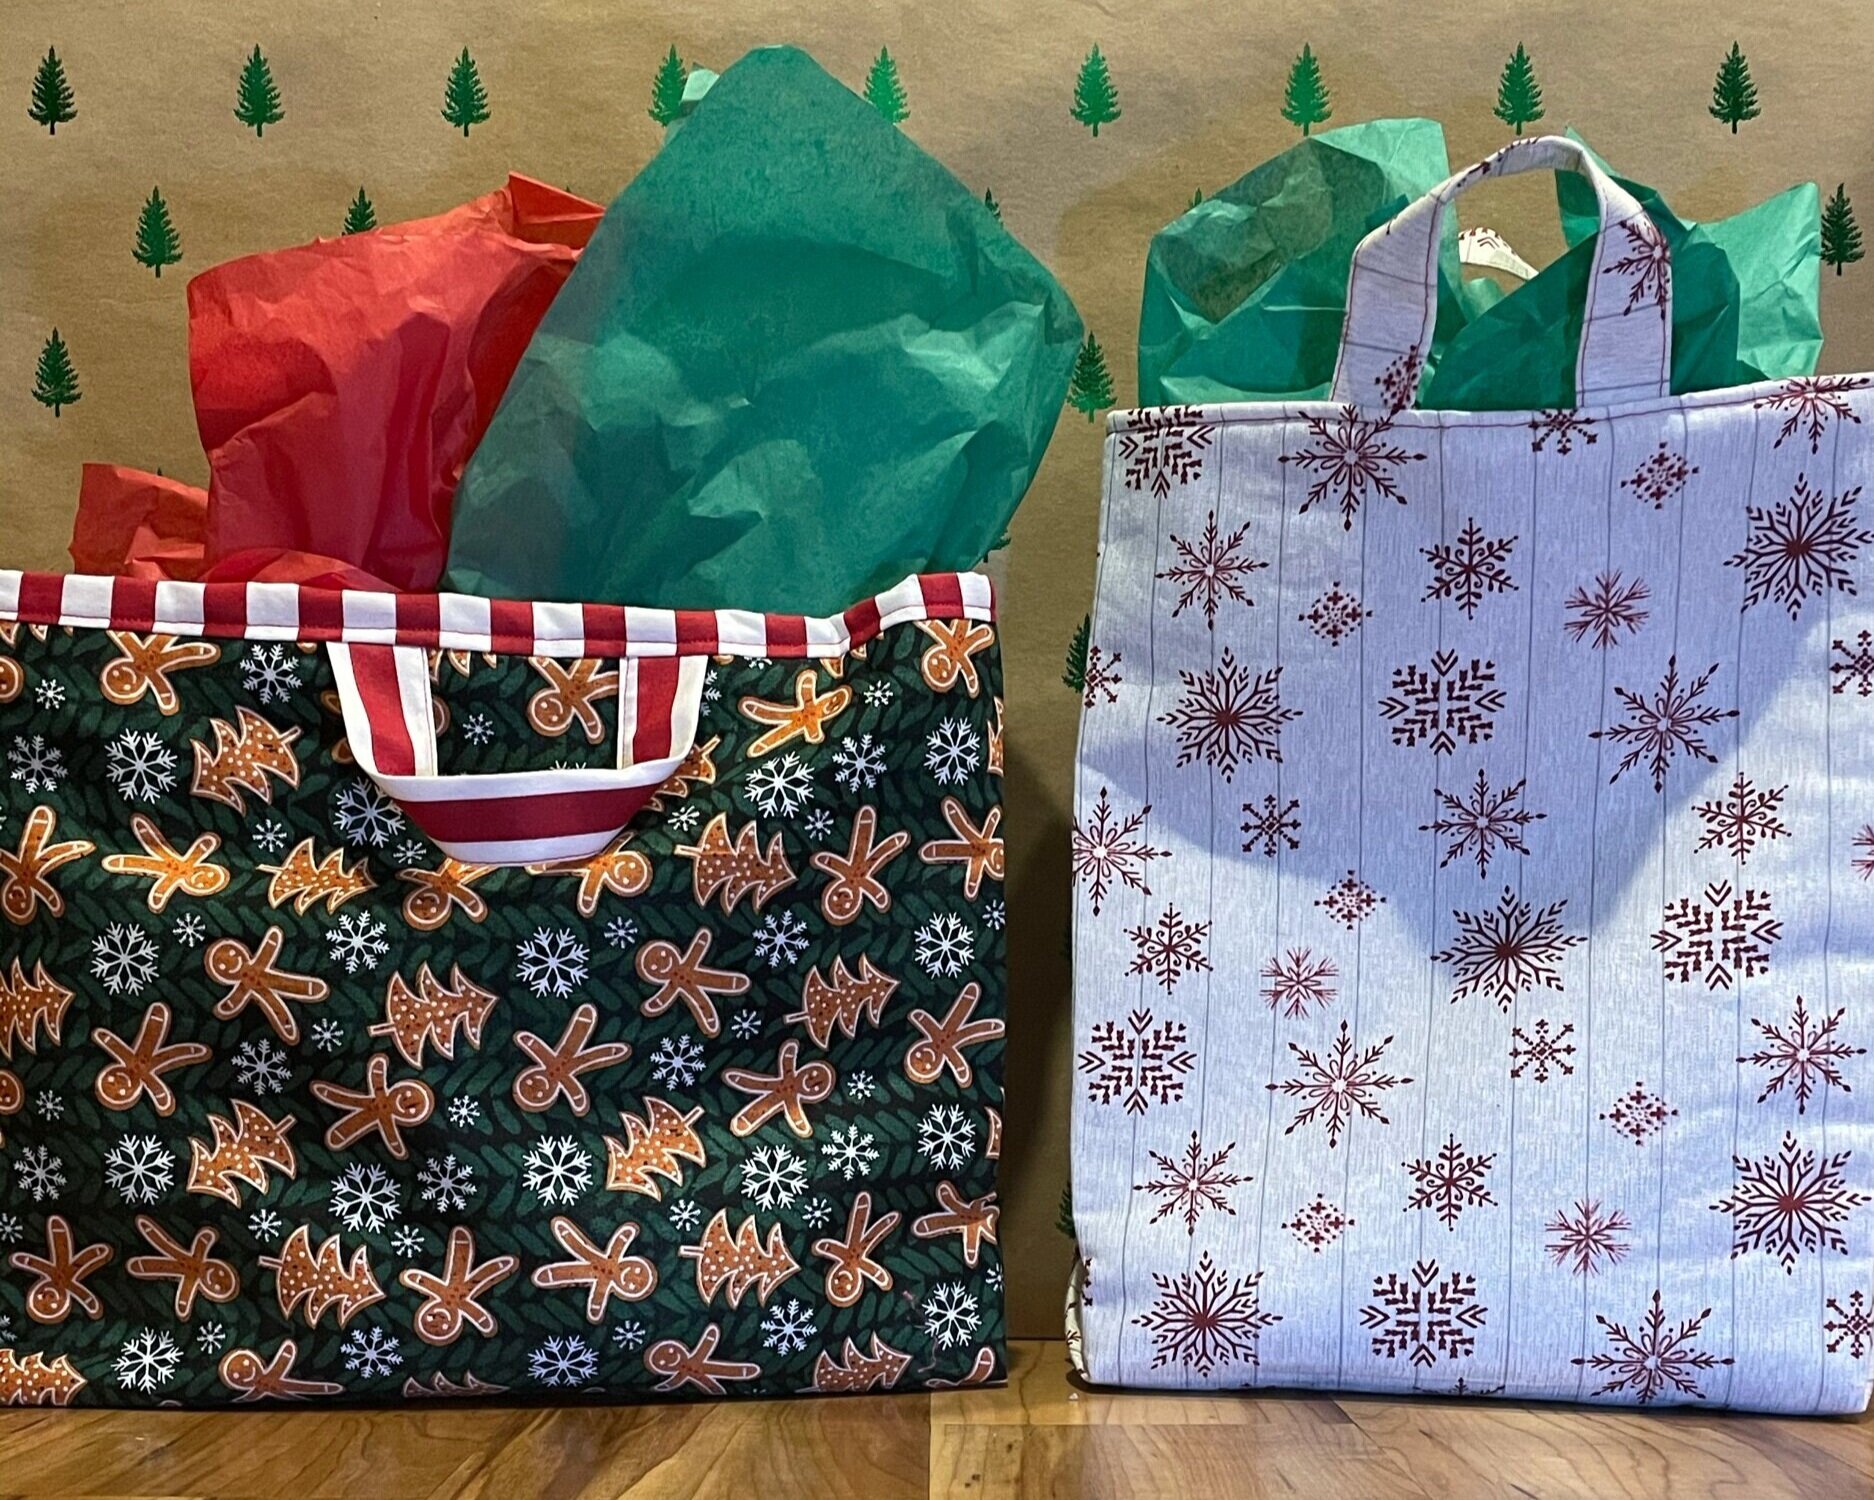
Look at that folded side!!
It imitates a paper gift bag and is the reason I loved this style so much!
***Since my fabric was directional, you can see that one side of the bag is upside down. I’ll talk more about this after the instructions.
Your Traditional Fabric Gift Bags are complete!
Enjoy the look of a traditional paper bag, but know that you will be able to use it for years to come! Just add your gift and some tissue paper (optional) and you are done!

Hot Tips

This project is best done as a batch project.
What is a batch project?
A batch project is where you work on steps of a project in large quantities before moving on to the next step.
For example, I cut out all the bags (outer, lining, fusible fleece, handles, and interfacing) one night and put away my cutting mat since I wouldn’t need it again. Then, I fused and ironed them the next night. And then sewed them together the following day.
You can make the handles out of either the outer fabric or the lining fabric. I preferred the contrasting handles.
Once you have finished your bags, you can fold the side seams in half and press to make the squared bottom more pronounced.
If you have a directional fabric, you could make a seam along the bottom of the bag so that both of your patterns are face up.
When considering how big you want your base, think about what you will put in it. The wider the base the wider you may want to make your sides. If I added another 5” of fabric to my length, this could have been a great wine gift bag. Or I could have added 5” to the width and this could have been a gift bag suitable for a medium toy or stuffed animal.
I recommend cotton for this project since they are a breeze to work with; however, I had some leftover flannel (the penguins and pink snowflake) from a pajama set I made and they made the most adorable bags!
2 yards of fabric allowed me to create at least 7 or 8 bags in this style, plus other variations (which you can find here and here). In the end, I probably have about $1 -$1.50 in each bag; that’s a far cry from the $2-$8 they want in the store for a bag that’s most likely going to be destroyed after one use!
If you are interested in patterns because you don’t want to do math (I totally get it!), I don’t have patterns drafted…BUT here are some places you can find similar patterns:
Things I would do different…
I loved this design so much! Even though these took me a few days to make (because I batched them), I really enjoyed making them. They are simple and fun to make and would make a great gift on top of the gift you are making! Here are some things I would like to try with this bag:
First, I recently received a Cricut Maker and I would love to add in some cut vinyl decals or felt shapes to really personalize the gift bag.
I know you might be rolling your eyes and thinking “Oh another Cricut project” or you might be thinking “Oh the endless possibilities!” I’m leaning towards the latter.
While each fabric I used had its own pattern, I would love to try my hand at designing some additional elements to add to each bag. I wouldn’t add a name because I want them to be interchangeable year after year (gift sizes and for which person may not be).
But, I could add on some snowflakes, gingerbread men, snowmen, ornaments, a “Merry Christmas” or “Do not open till Christmas” to any of the bags to sort of ‘spice’ them up! The possibilities are endless! You could tailor it to fit the personality and style of each recipient.
Additionally, I know the Cricut machines have the ability to cut fabric, so why couldn’t they cut out the dimensions of the smaller bags?
Stay tuned for that potential SVG file… that is once I learn how to use the fancy new machine!
Second, I would choose more solid fabrics.
While I really loved my fabric selection (especially the gingerbread/ red stripe combo), I would opt for some plain fabrics as well. I chose a handful of novelty prints because I wanted a Christmassy theme…
But, I am aiming for longevity on these bags so my style may change over the years.
And yes, I could gift them to others if I no longer wish to keep them for my own, but I would like to fall into a habit where I am making new bags every year or every other year.
If I had more solid colors, then I think they could fit into a more universal Christmas theme.
Plus, adding any design to them would make the design stand out!
Third, I would make these bags in different colorways for different occasions.
Who said these bags can only be made for Christmas???
These would work beautifully to hold a baby shower gift in or customized for a Mother’s Day gift bag.
You could grab some fabric paint and have kids apply their handprints to the bags and you have memorabilia for any parent or grandparent! (I’m going to try that one out this year!)
I mean, these bags are adaptable for any occasion.
Lastly, I would try some bags with grommets and ribbon/cording for the handles.
Typically, paper gift bags have corded handles and I think this would complete the aesthetic for this design. Not only would it save some cutting, pressing, ironing, and sewing (so basically all of the steps), but It would be another way to add unique details to the design.
Overall, this project was so quick to whip up that the only thing I would change is the dimensions! I can’t wait to explore my customizing options!
I really hope you enjoyed this make! If you did please consider subscribing to my newsletter, so you never miss a new project!
If you make these gift bags, make sure you tag them with #DarkkFluriDIY so I can see your creations!
Here are bags I did for my daughter’s birthday!


